Table of Contents
WiFi Sponsoring
One of the basic needs of a digital nomad is WiFi access. In times of eduroam this is usually effortless. But what to do, if the guest doesn‘t have an eduroam account? The new WiFi sponsoring comes to the rescue.
WiFi Sponsoring Step by Step
Requesting an Account (as a Guest)
- Connect to the Network with the SSID GuestOnCampus.
- Now your device should open a login page. If your device does not open the login page automatically, open your browser and enter http://wlan.gwdg.de into the address field, to get to the login page.
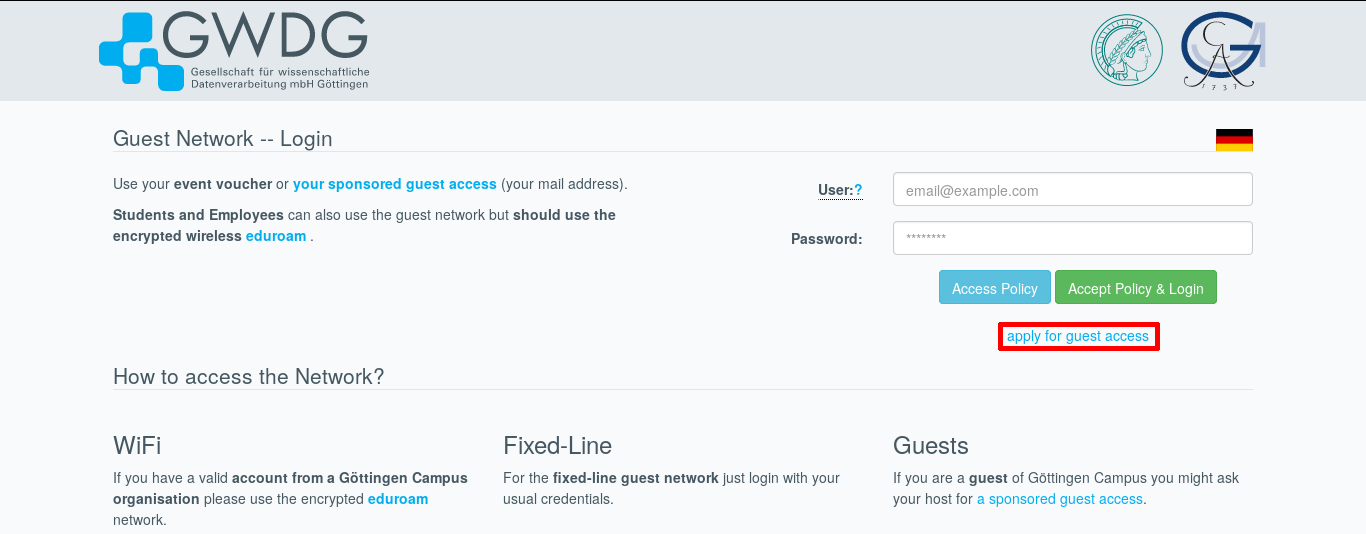
- On this page klick on the link „apply for guest access“ to get to the request form.
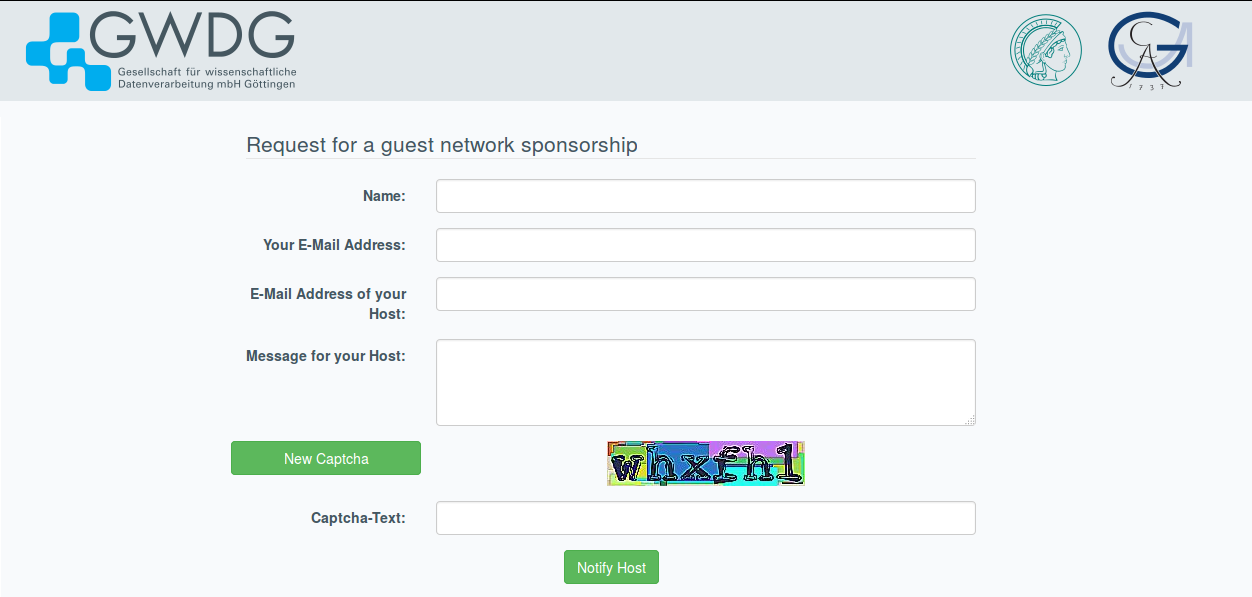
- Now enter the following data into the request form and confirm the request by clicking on the „Notify Host“ button afterwards (see figure 2):
- Your name,
- your e-mail address,
- the e-mail address of your host (sponsor),
- a message to your host (This message should help your host to check if the request is yours) and the text you see in the captcha image.
- After you have completed these steps successfully, you will be redirected to a website where you can see your e-mail address and the password the system generated for you. Please write down the password because you will need it to login after your host approved your request .
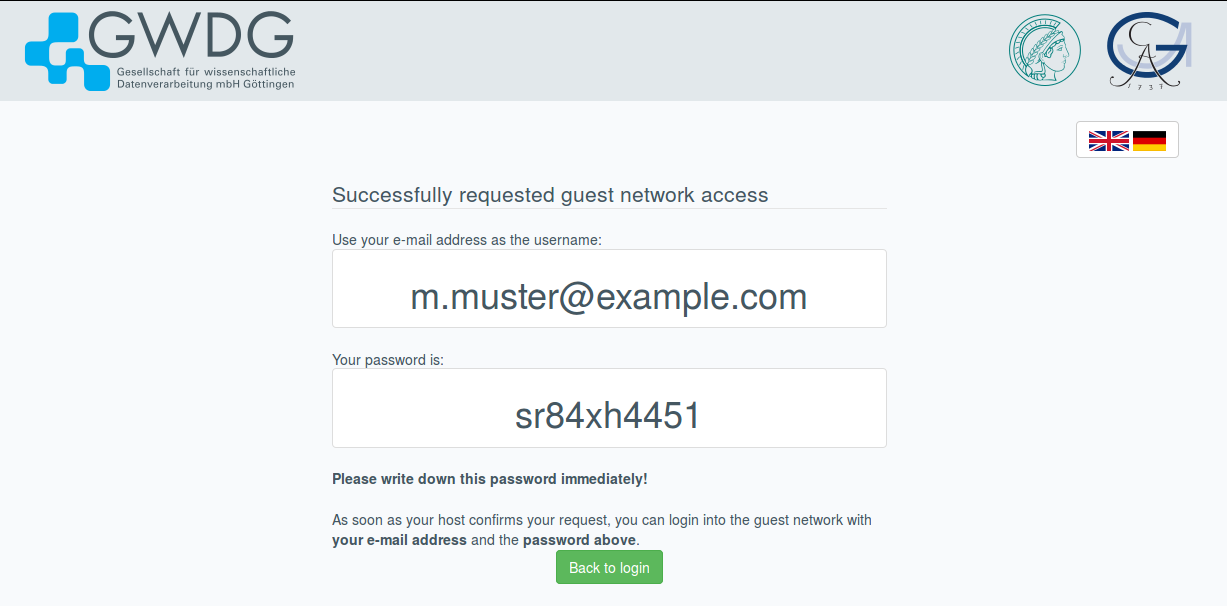
- Klick on „Back to login“, to get back to the login page.
- After your host approved your request you will be able to login on the login page with your e-mail address and the password you wrote down in step five.
Approving requests (as a Host)
After a guest submitted a request for an account and entered you as his host you should get an e-mail prompting you to approve the request. If you get such a request and don‘t know the guest or don‘t want to approve it you can just ignore the e-mail.
If you want to approve such a request follow these steps:
- Visit the page https://voucher.gwdg.de with your browser and login in using your account.
- You will see all requests of guests, that entered your e-mail address in the host field. It is important that you check if the request is really from a guest you know. We are not able to check the guest‘s e-mail address since guests may not have internet access. Also the name may be spoofed. In doubt call your guest.
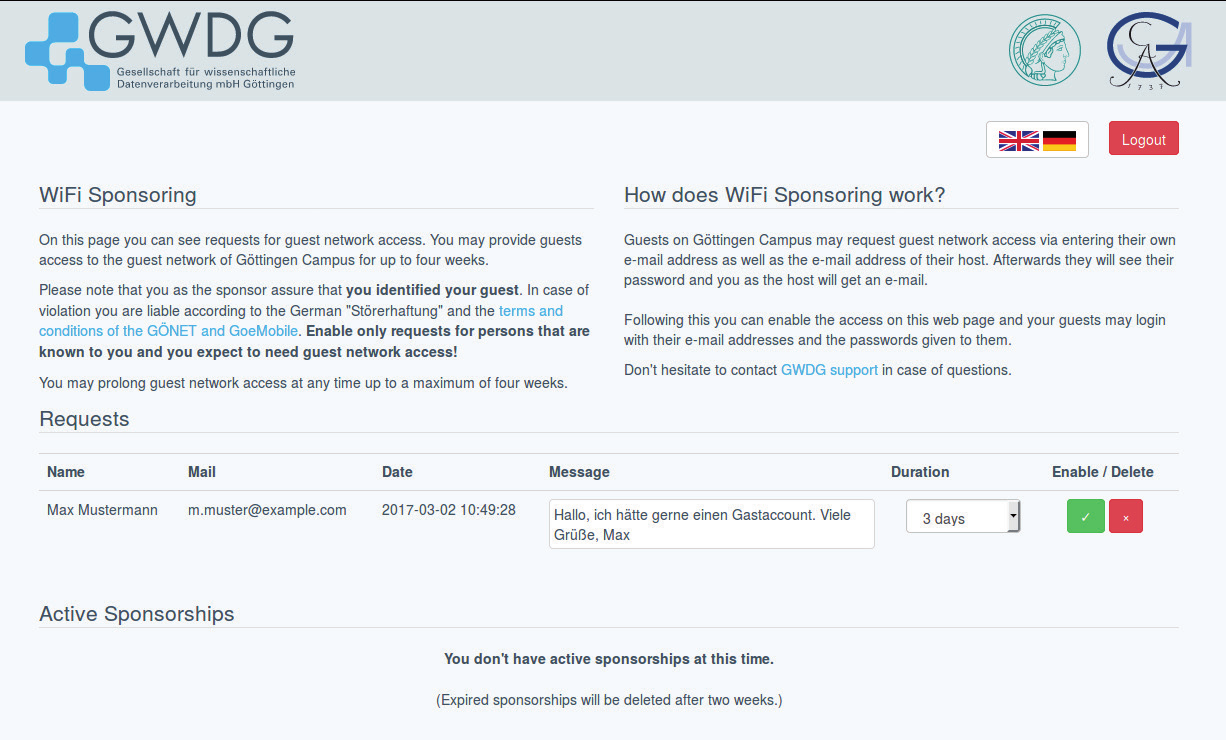
- Before approving the request you may change the duration of the accounts validity. This cannot be more than four weeks.
- By clicking on the green tick (Activate) you can approve the request and activate the guest account.
- After you approved the request the guest account is active and the guest can login immediately. The guest can login using his e-mail address and the password the system generated for him (see figure 5).
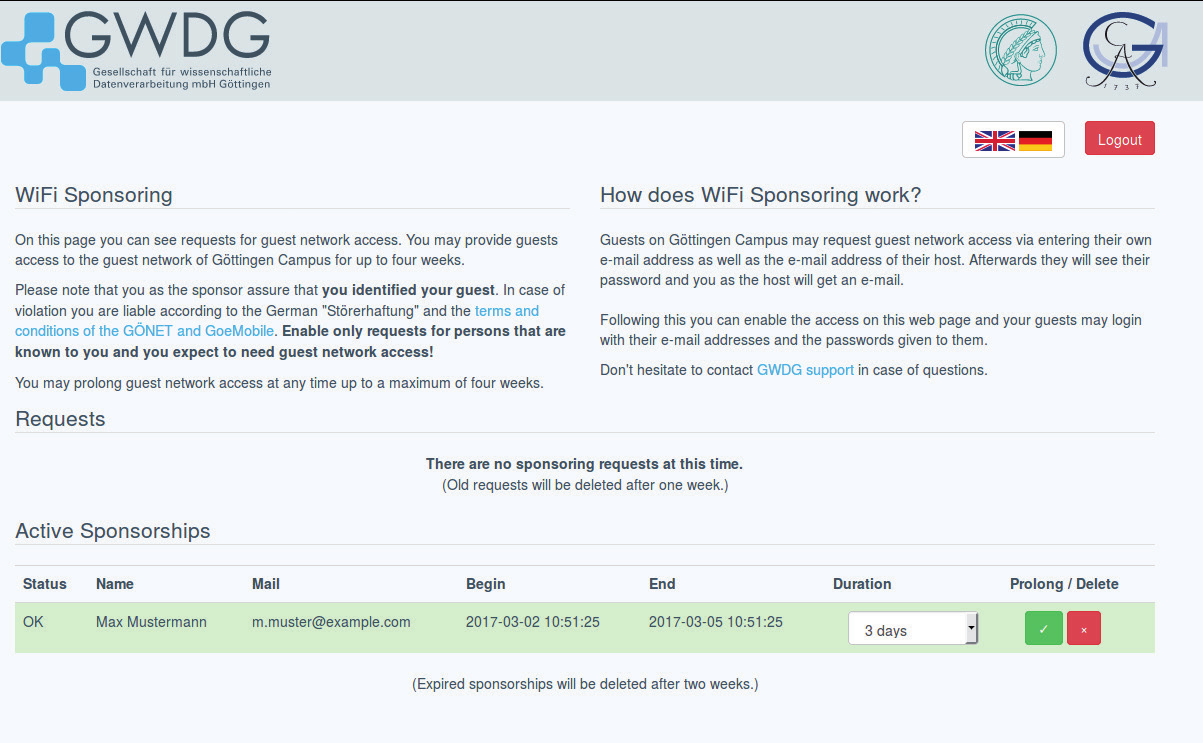 You may also delete or prolong active accounts to a maximum of four weeks.