Table of Contents
GWDG Nextcloud
At the end of 2026, our ownCloud systems will be decommissioned. owncloud.gwdg.de and sync.academiccloud.de will no longer be available from that point onward. After that, only our new Nextcloud-based sync-and-share service will be available.
Once our ownCloud systems have been shut down, owncloud.gwdg.de/sync.academiccloud.de will no longer be available.
From that point on, only our new Nextcloud-based sync and share service will be available.
The migration of your OwnCloud data to Nextcloud must therefore be completed beforehand.
Due to the enormous amount of data, it is not possible to transfer the entire system automatically. All users who wish to continue to have access to their ownCloud data after the changeover must therefore migrate their accounts.
Although migration is theoretically still possible after this date, we strongly advise against it. On the one hand, the process will then involve significantly more effort, and on the other hand, once the ownCloud systems have been shut down, access will no longer be possible, meaning that name conflicts can no longer be resolved by renaming. A seamless transition is therefore not guaranteed, and considerable delays are to be expected.
Migration Information
Please clean up your ownCloud before the migration and delete old or unnecessary files. This significantly reduces both the effort required for the migration and the likelihood of errors.
There are several options available for the migration, which are explained below:
Migration using the migration tool: Information about the migration tool
Manual migration: If the migration tool is overloaded, cannot be used for other reasons, or if you prefer to perform the migration without the migration tool, you can also perform the migration manually. Manual migration
Information on the migration tool
To make the migration as simple and straightforward as possible, we provide a special migration tool. With it, you can easily transfer all files from your ownCloud or AcademicCloud ownCloud account to Nextcloud.
The migration tool is available at:
move.owncloud.gwdg.de for GWDG-ownCloud accounts
move.sync.academiccloud.de for Academic-Cloud-ownCloud accounts
During migration, in addition to all files, user shares of your own folders as well as group shares (if originating from your files/directories) will be transferred.
Which data will not be transferred?
Please note that not all content can be migrated automatically. The following data and shares must be taken over manually or reconfigured:
- Public links: All previous ownCloud links will become invalid, as the URLs change.
- Files shared with you by other users: These will only become available again once the owner has carried out the migration. To assist you, after the migration you will find the file `migration-info.txt` in the root folder of your Nextcloud, which contains an overview of all non-transferred shares.
- External drives: Files in mounted external drives will not be migrated. External drives must be reconnected in Nextcloud.
- Calendars (e.g., appointments): Can be exported in ownCloud as an ICS file and then imported into Nextcloud or another calendar service.
- Contacts: Can be exported as a VCF file and re-imported elsewhere.
Procedure of the migration tool
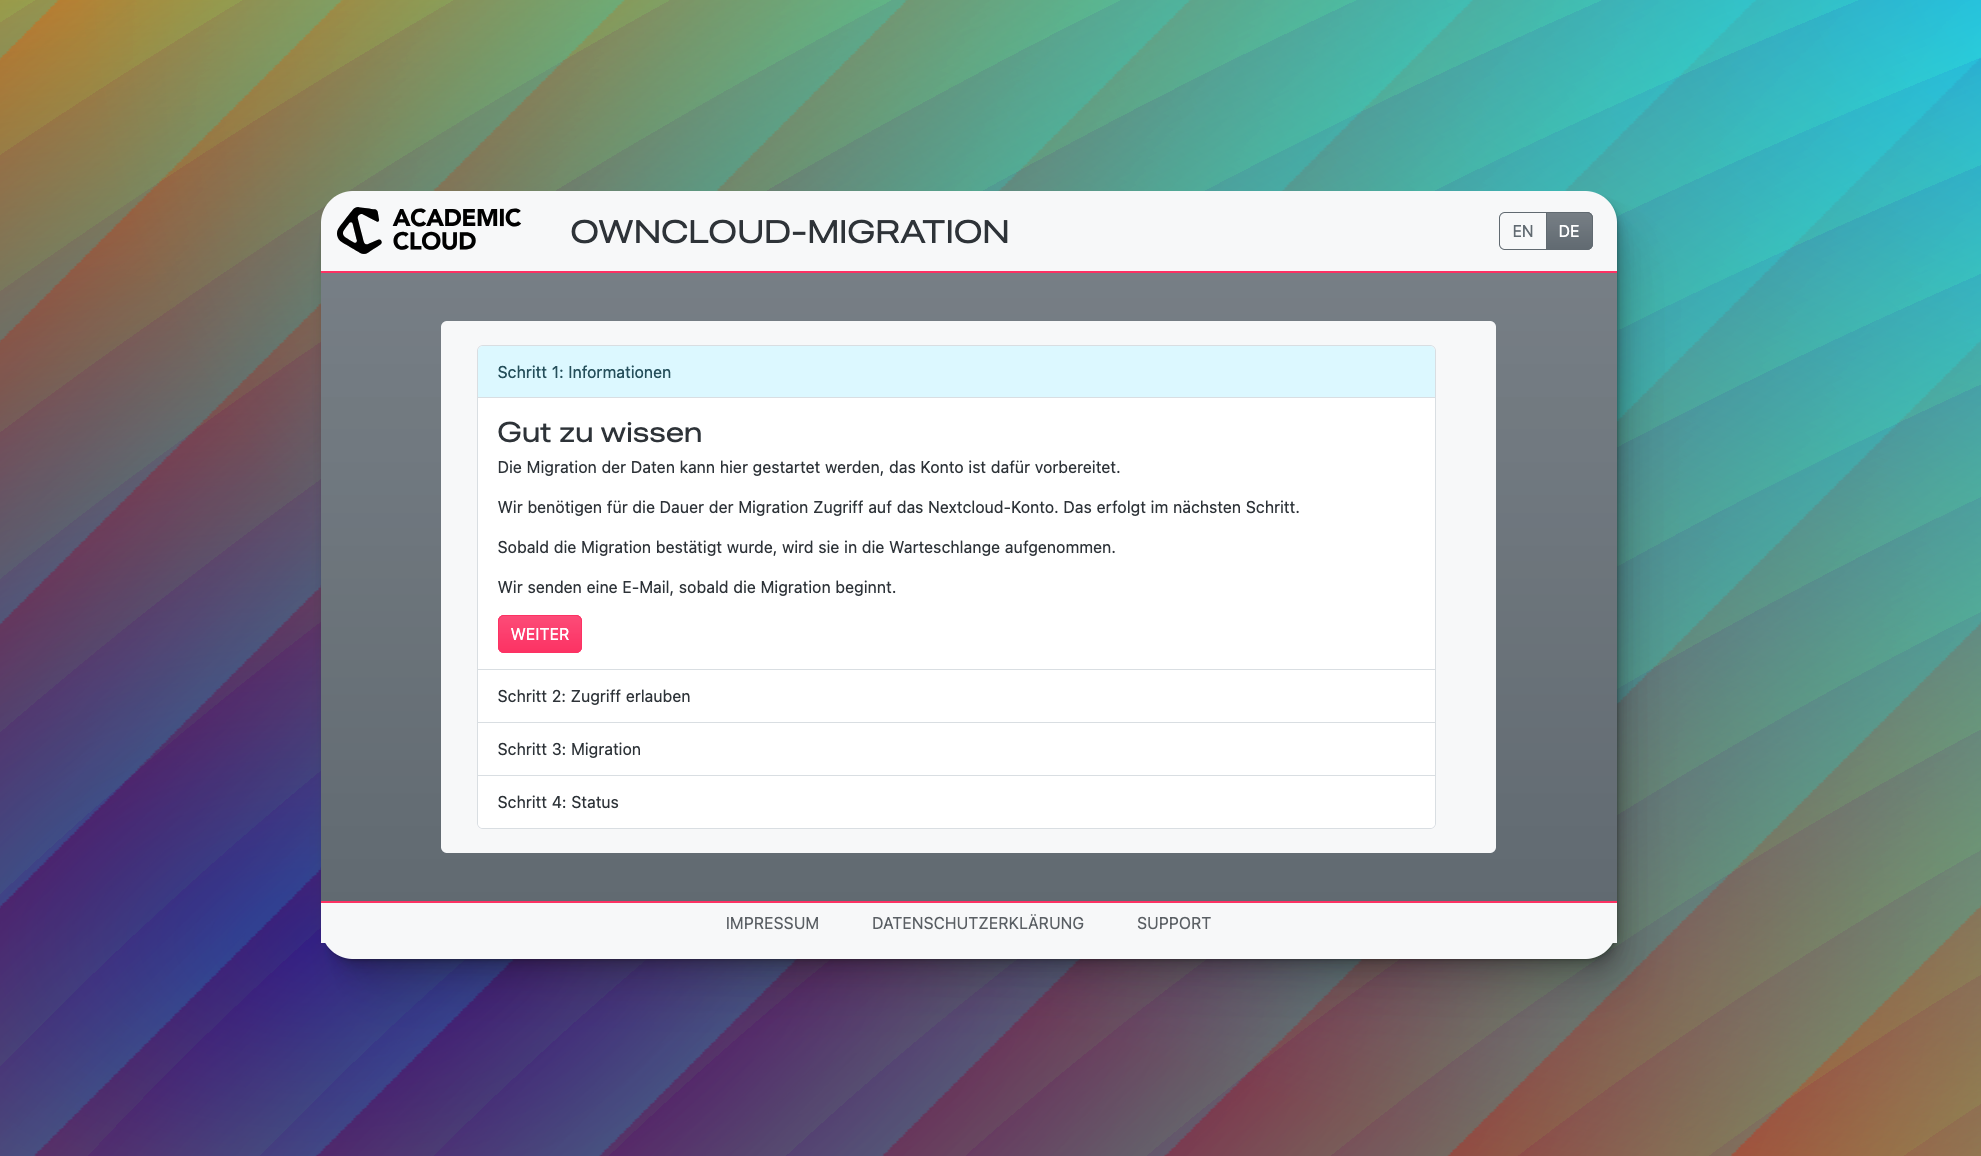
1. When opening the migration tool, a window with some information will appear first. By clicking “Next,” you move on to step 2.
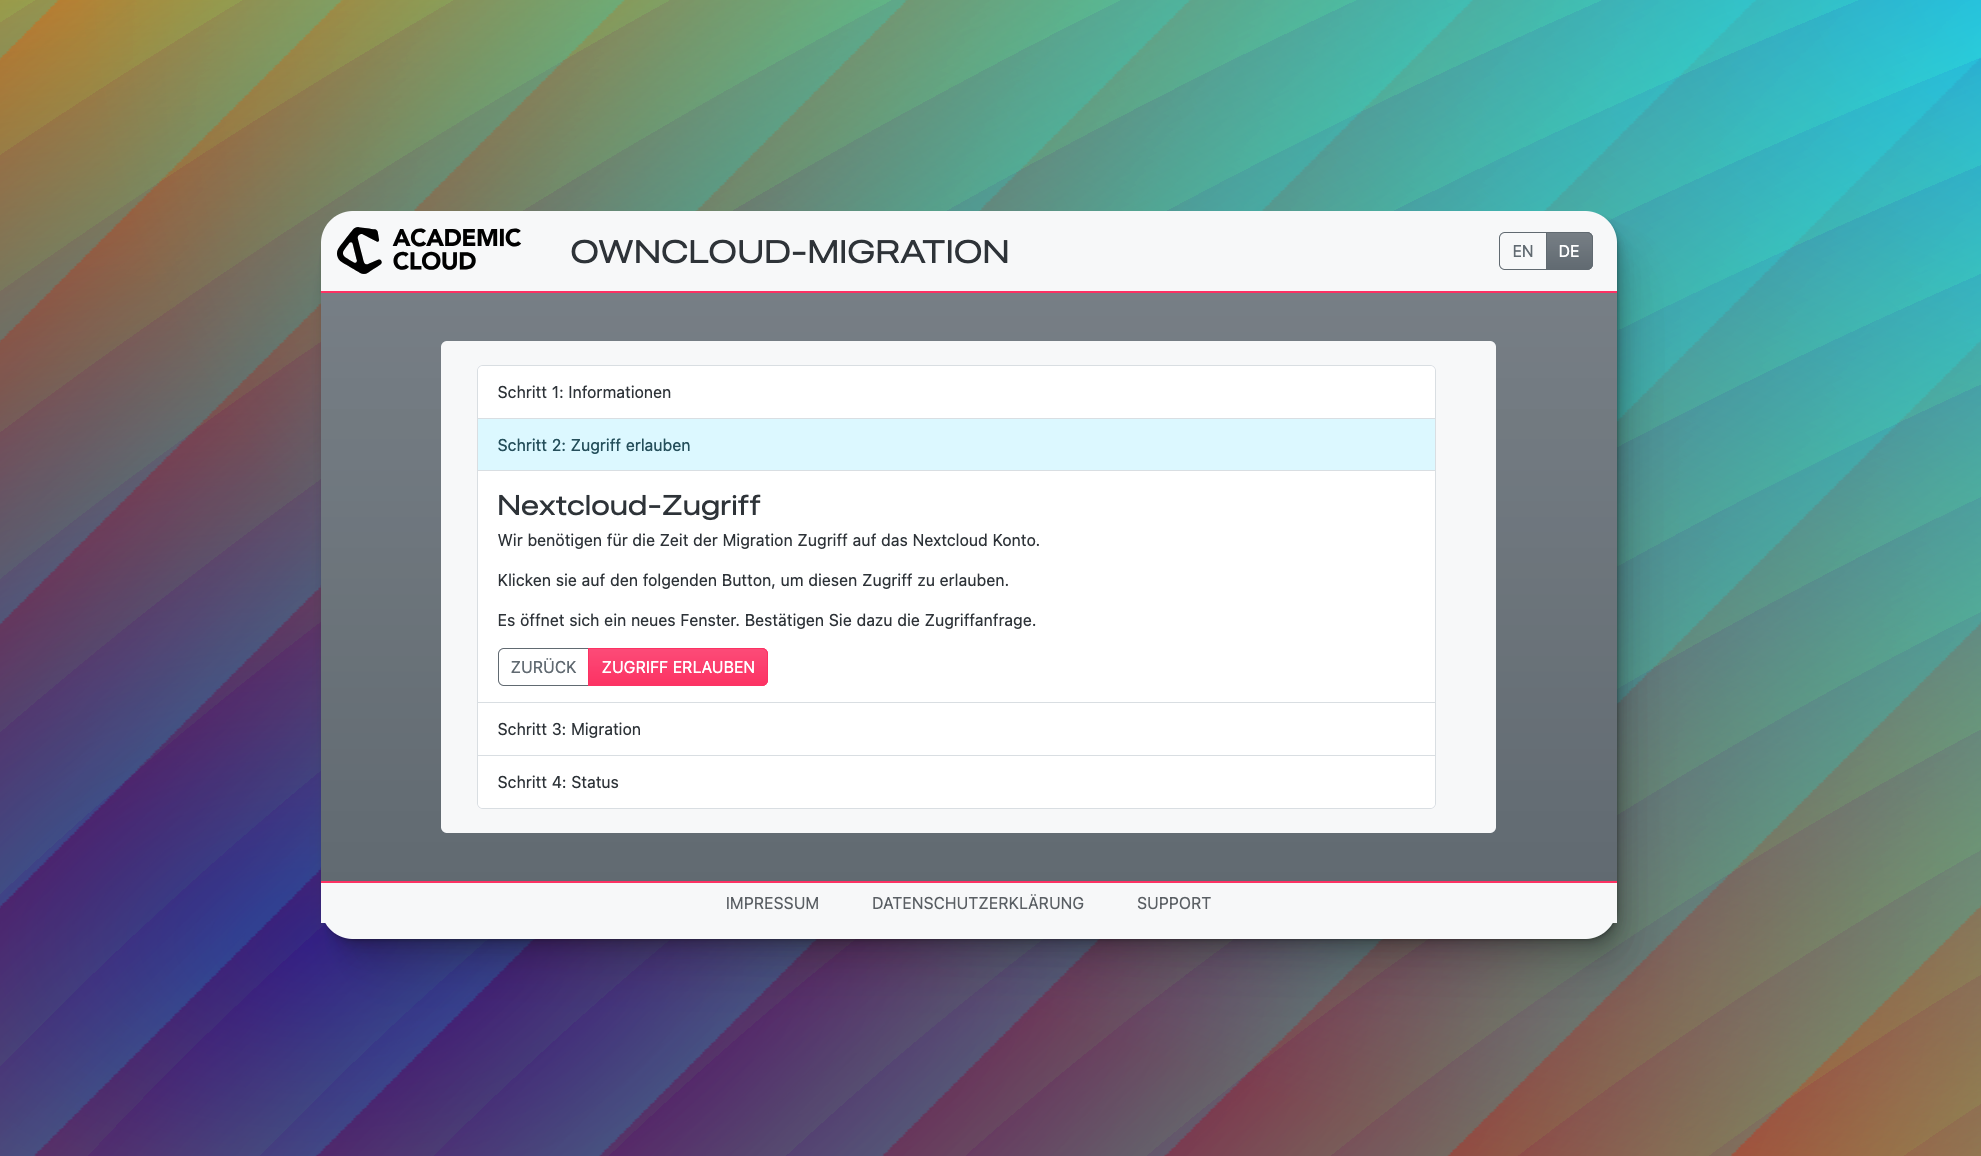
 2. In this step, simply click “Allow access.”
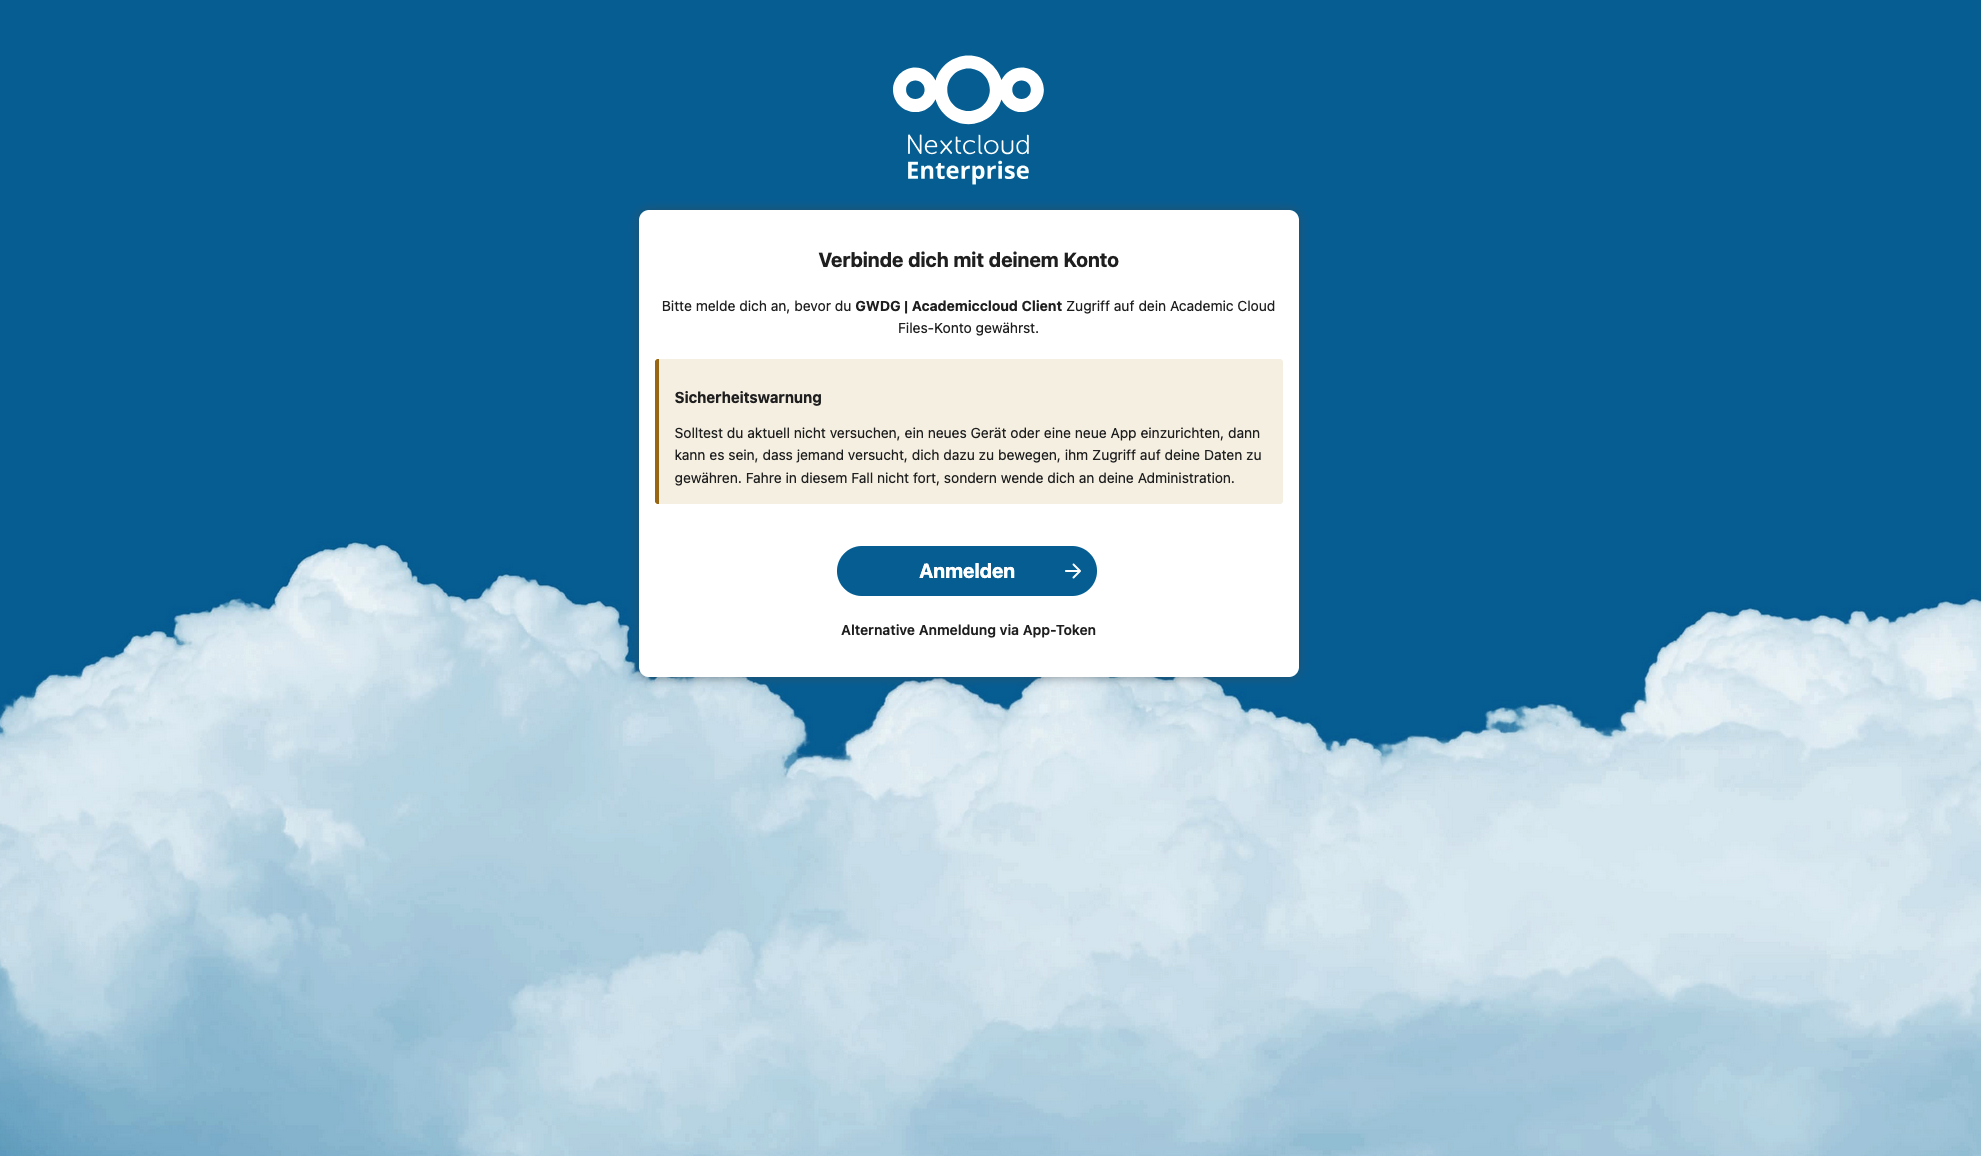
 3. You will then be redirected to a Nextcloud page where you must authenticate with your usual SSO login credentials.
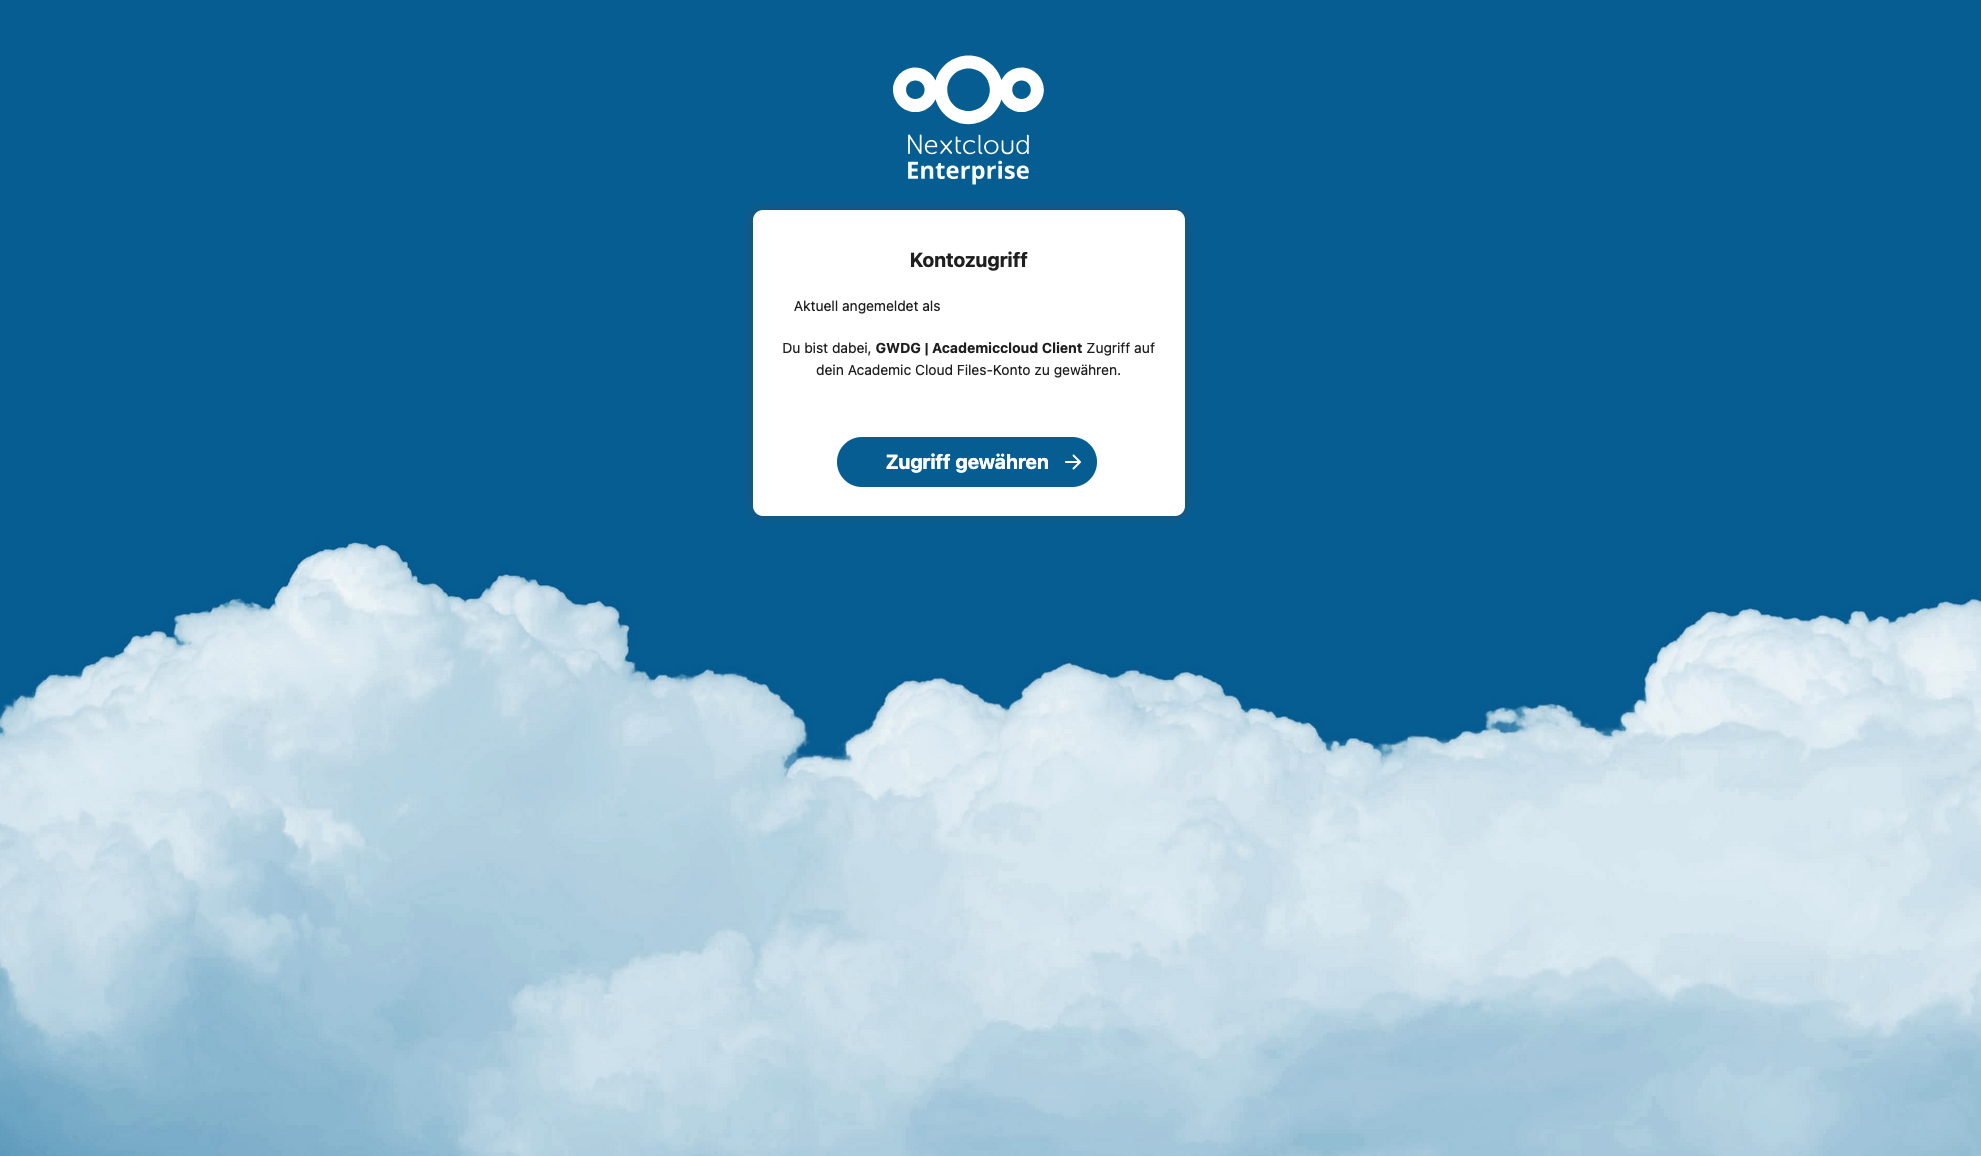
 4. Once the login is successful, click “Grant access” again to allow the migration tool to access your Nextcloud account.
 5. You can now start the migration. By clicking “Next,” your account will be placed in our migration queue. As soon as the migration of your account begins, you will receive an email from us.
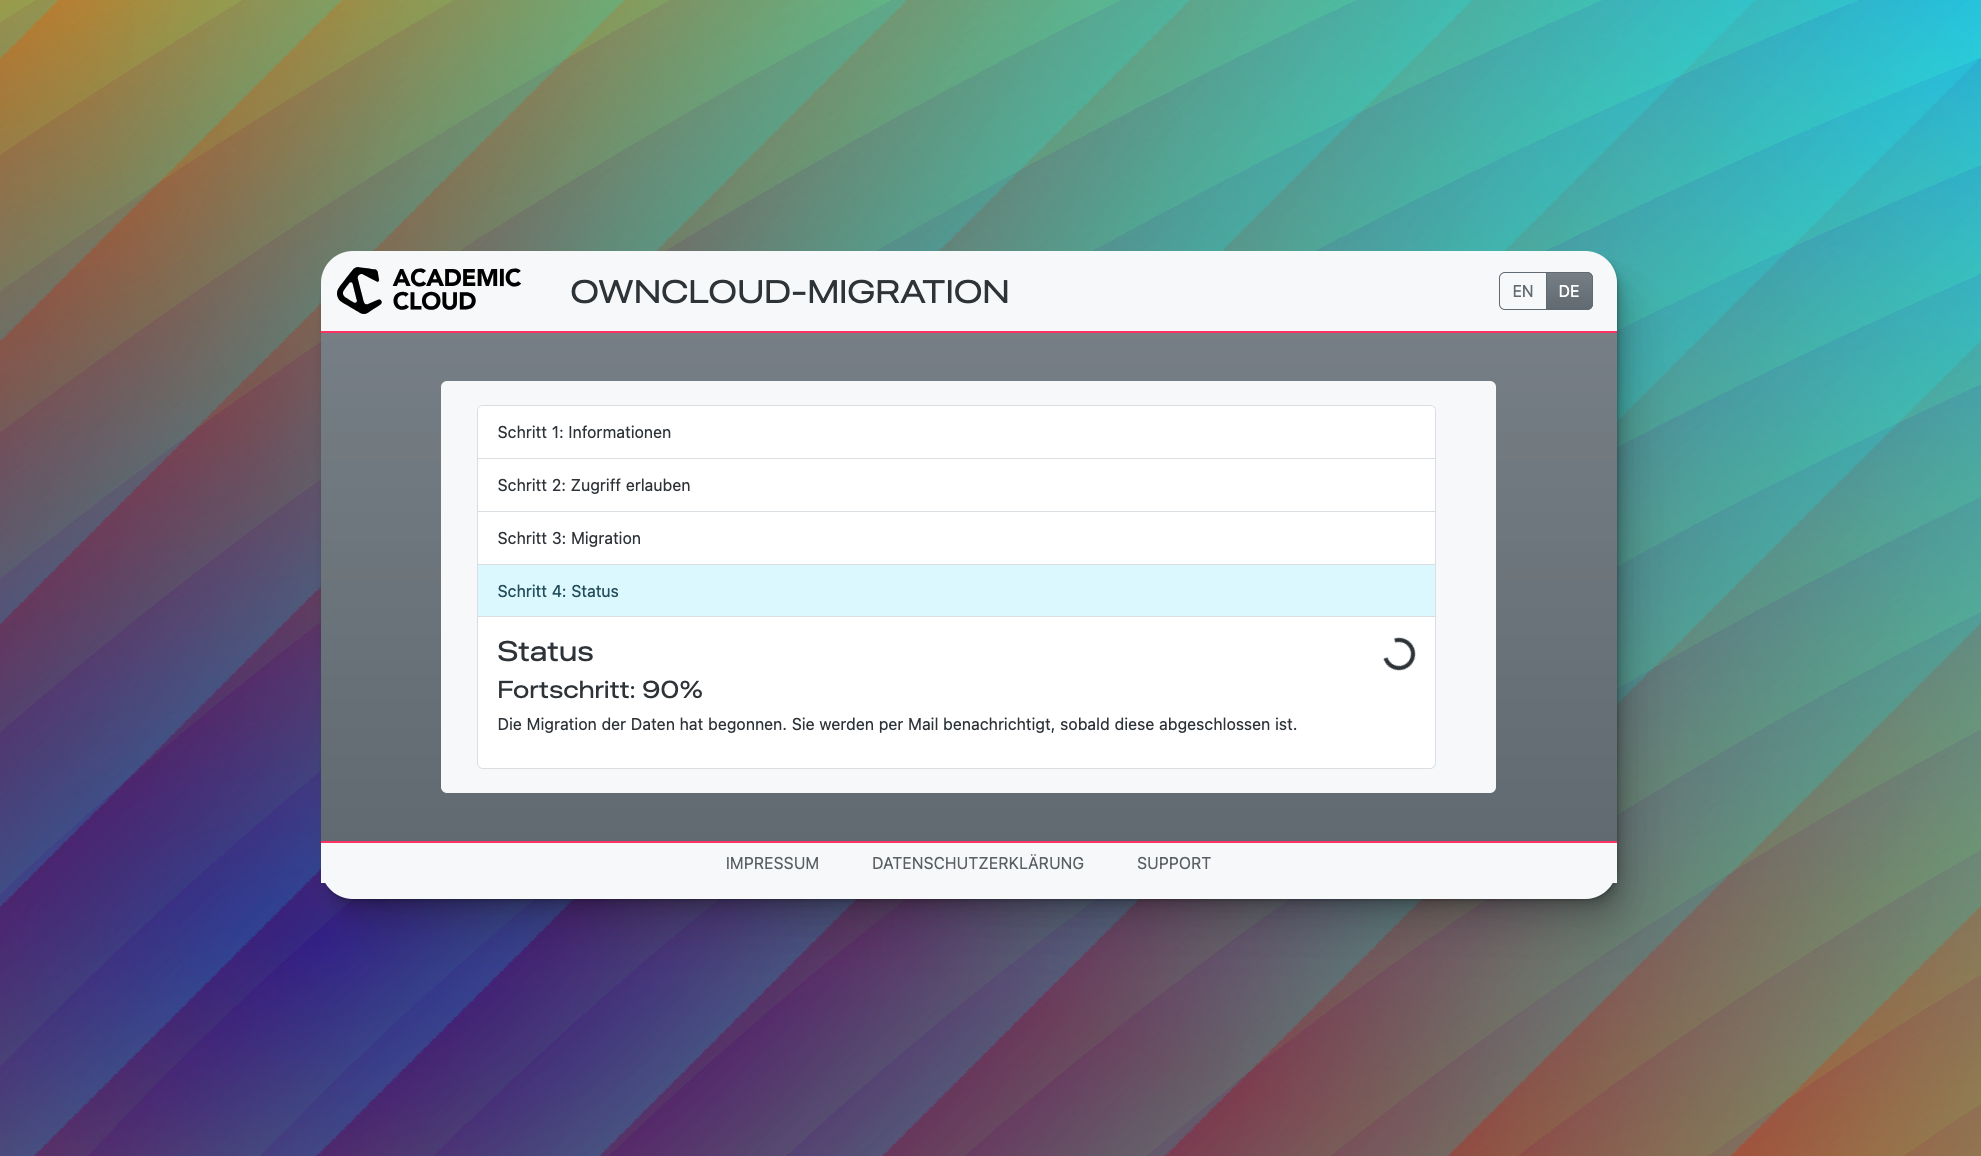
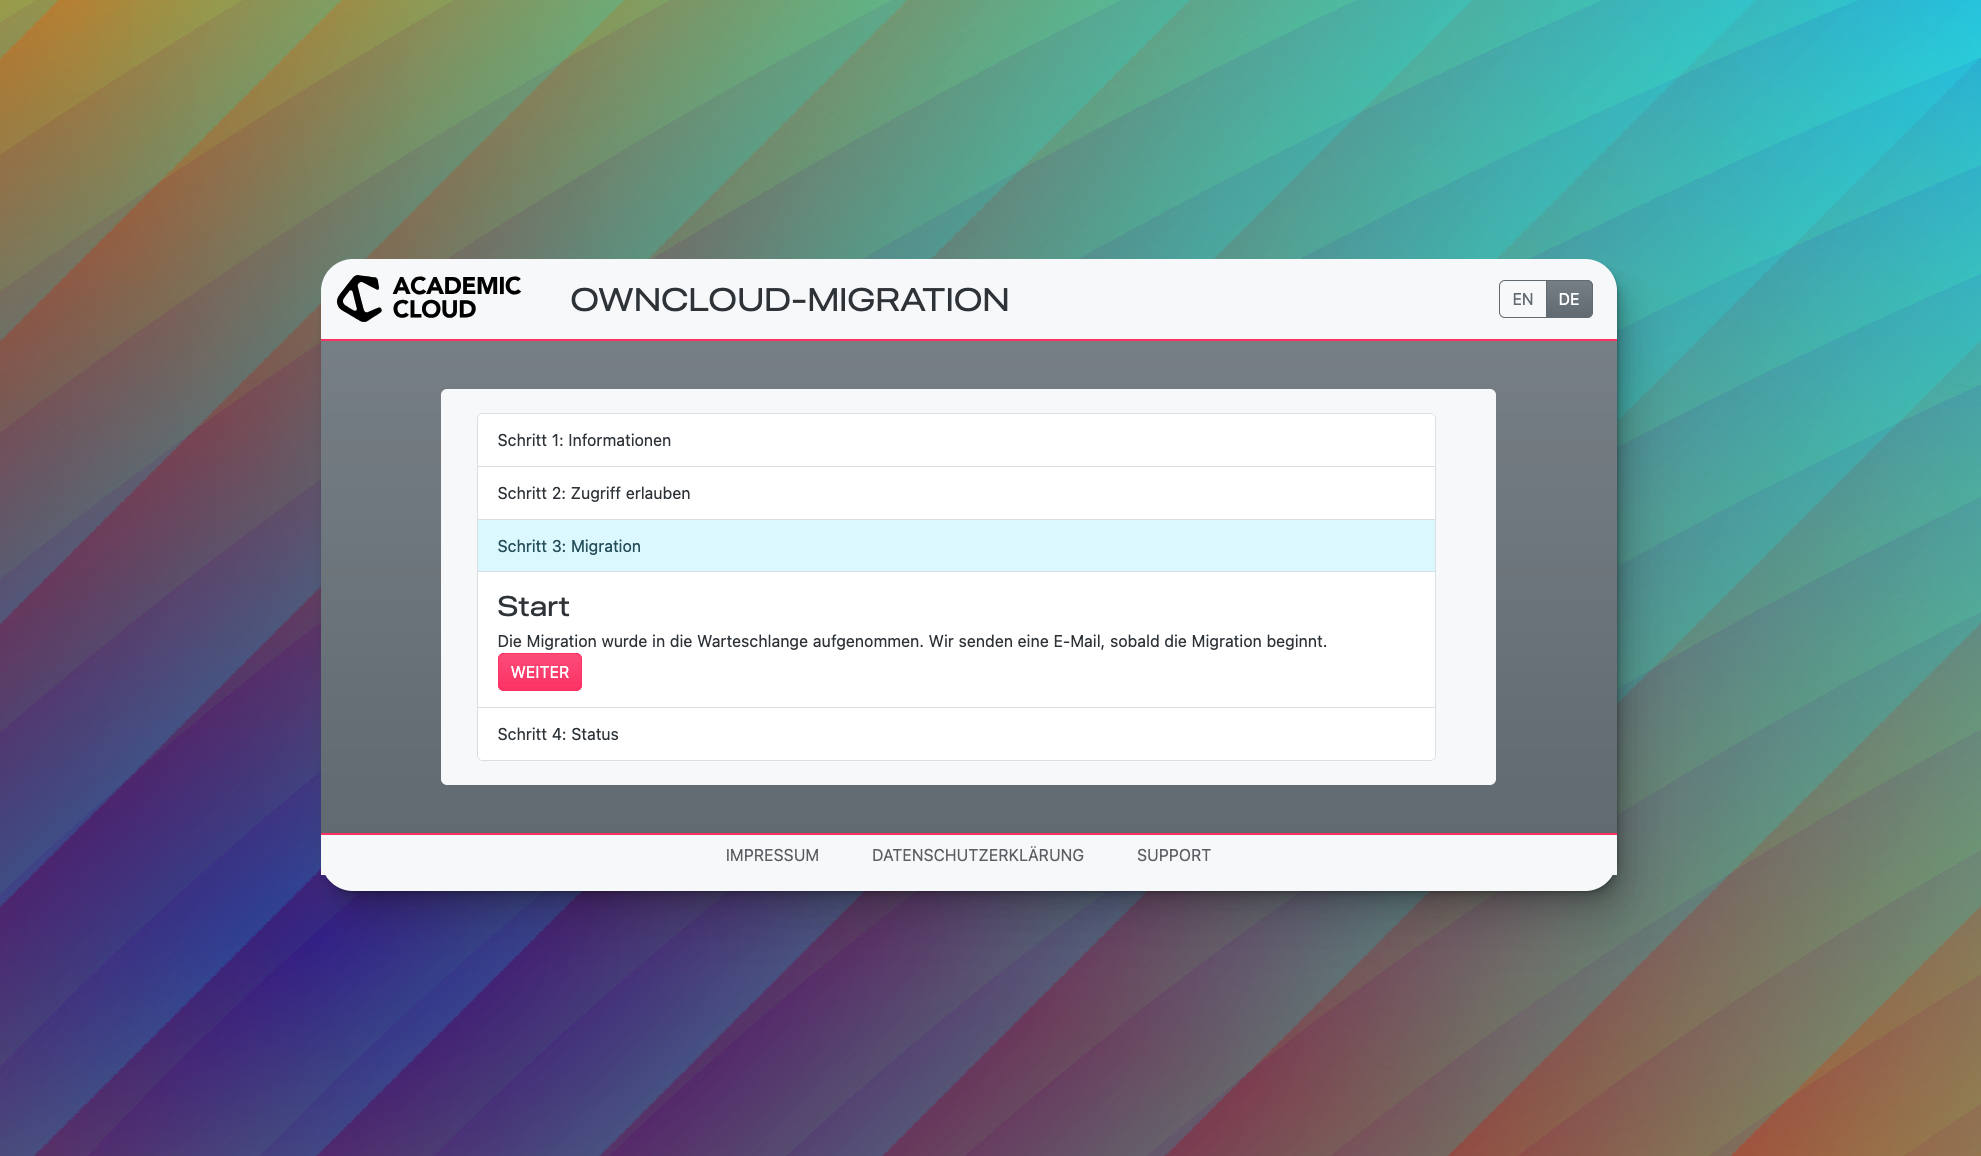 6. You can also check the status of the migration directly in the migration tool.
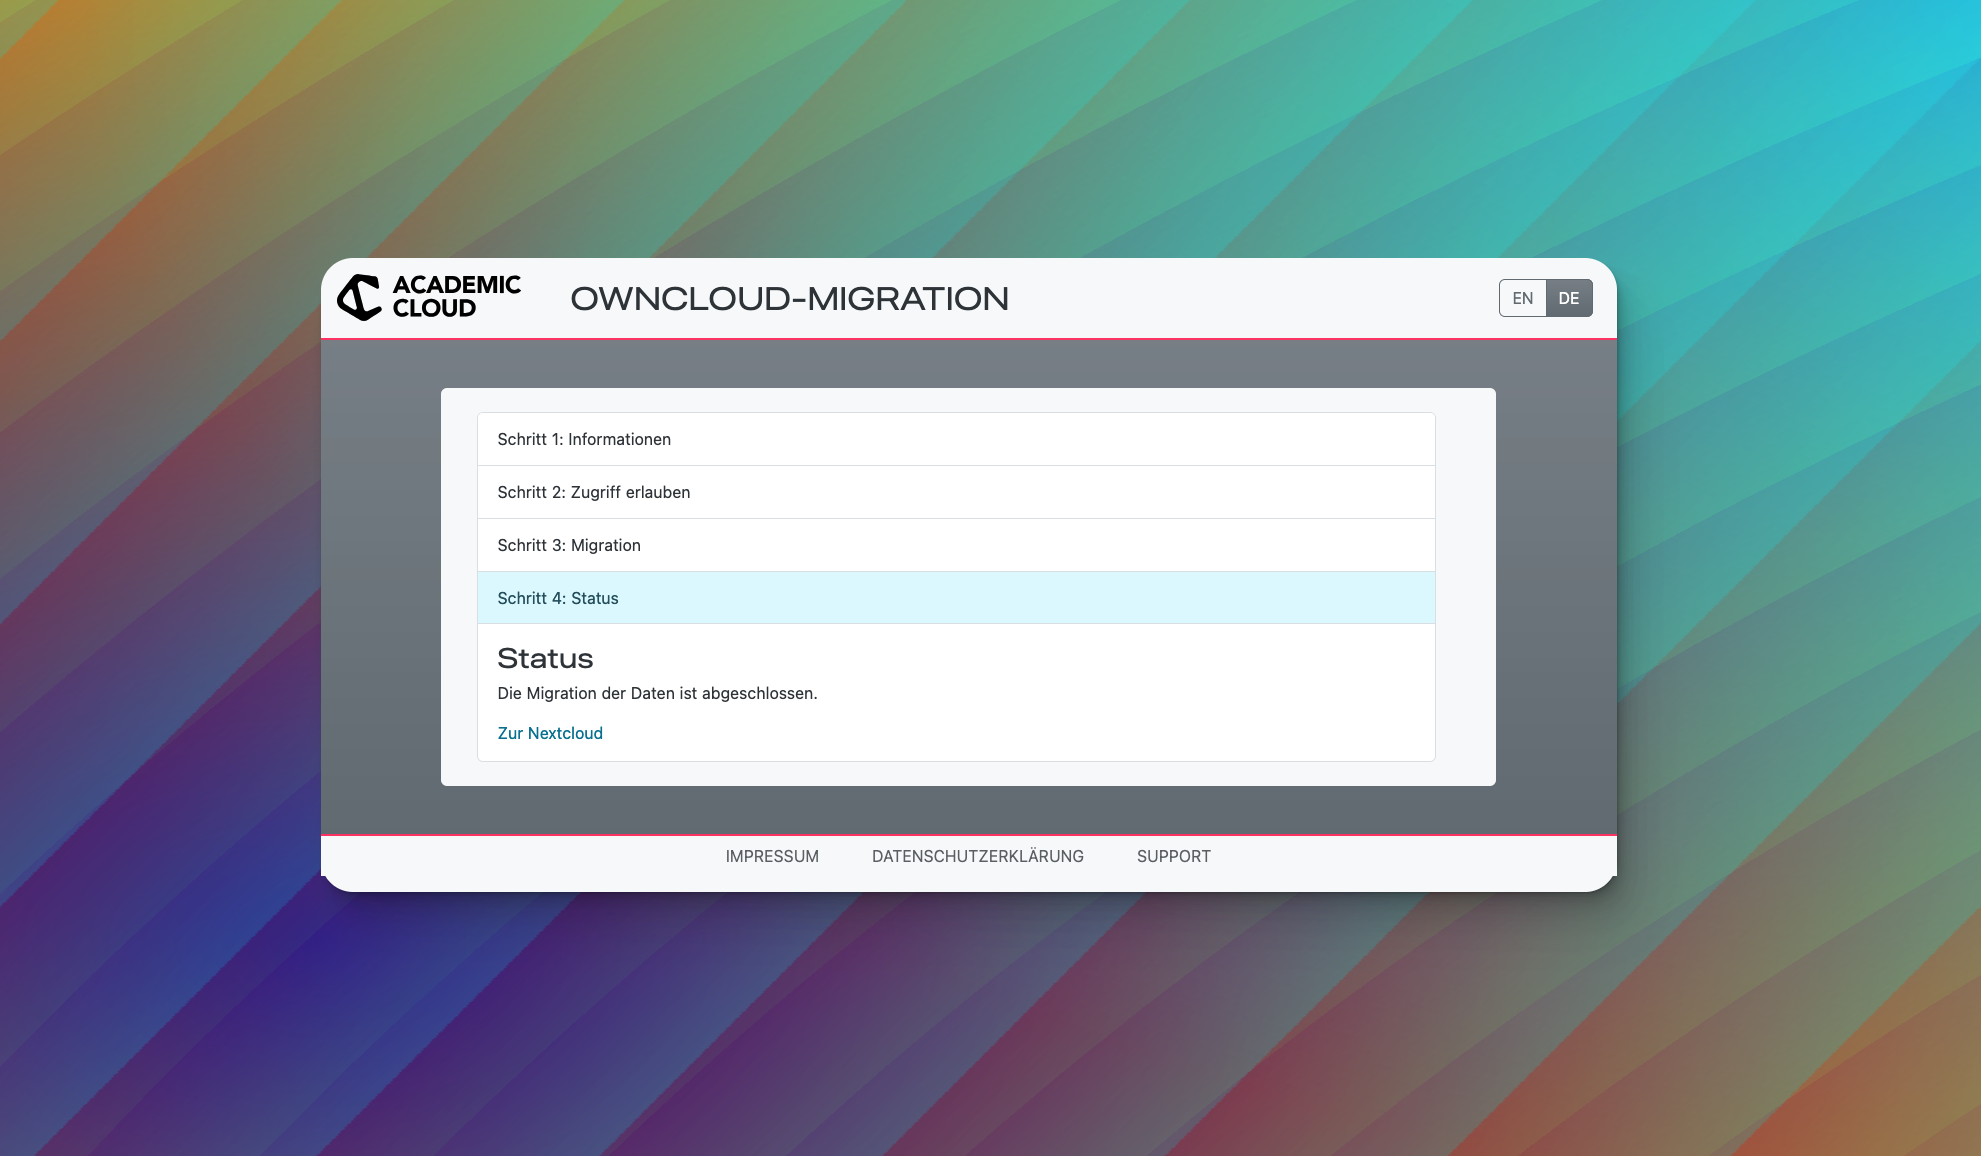
 7. Once the migration is complete, a confirmation window will appear. Your data has now been successfully transferred to Nextcloud. In addition, you will receive a direct link that allows you to immediately access your new Nextcloud account.
Note: During the migration, you will regularly receive email notifications updating you on the current status.
What happens after the data transfer?
After your data has been transferred, you will have ample time to verify that all necessary files have been moved correctly. All files in the source account on ownCloud will be deleted no sooner than one month after the migration is complete.
If files are missing or other problems occur, please contact our support team with the subject line “Problem with migration to Nextcloud.”
Please also note that all shares and public links will automatically be set to “read-only” after the migration. While you can manually re-enable write permissions, no further migration will be possible afterward, since the read-only status would also be transferred to Nextcloud. Therefore, if you make changes to your files in ownCloud afterward, you must transfer them to Nextcloud yourself. We explicitly advise against this approach and strongly recommend coordinating within your groups, planning the migration of shares together, and switching to Nextcloud collectively from a set date, without making further changes in ownCloud afterward.
Manual Migration
If the migration tool is overloaded, causing problems, or if you wish to perform the migration without the migration tool for other reasons, you can also migrate your data manually.
With this method, the ownCloud files synchronized locally on your computer are transferred to a new Nextcloud synchronization folder.
Important: The files’ timestamps must be preserved during the transfer. The Nextcloud and ownCloud clients need this information to determine which files have been modified and in which direction synchronization should occur. For this reason, the files must be moved and must not simply be copied.
Step 1: Create a Backup
Be sure to create a complete backup of your current ownCloud sync folder before you begin the migration.
Make sure that you continue to work with the original ownCloud sync folder for the subsequent migration. The backup serves solely as an additional safety copy.
Step 2: Check Incoming Shares and External Storage
Open your ownCloud website and check whether you are using incoming shares or external storage.
For the GWDG ownCloud, you can find these sections here:
Incoming Shares
External Storage
For the AC ownCloud, you can find the incoming shares here:
Note: There is no external storage in AC ownCloud.
Remove any existing external storage.
Please set incoming shares that should not or cannot be transferred to “Rejected” via the … menu of the respective share.

Important: If you notice that a share comes from a colleague whose account may no longer be active—for example, due to an extended absence or parental leave—stop the migration at this point. First, determine how you will access this data in the future.
Only shares from active accounts can be transferred.
Step 3: Synchronize Changes to Your Own Computer
Wait until the changes you made have been fully synchronized to your own computer.
Then check in the ownCloud client to ensure that all files are fully available on your hard drive. Please also note the instructions under regarding the migration of external drives, appointments, and contacts. This data is not automatically transferred as part of the manual migration described here and may need to be migrated separately.
Important: If you use the “Virtual Files” feature, an offline migration is not possible. In this case, cancel the migration and first disable virtual files. Then wait until all files have been fully downloaded to your computer.
Step 4: Remove the ownCloud Client
Completely close the ownCloud client.
Then uninstall the ownCloud client.
Next, remove the ownCloud client’s configuration files.
Depending on your operating system, these are located in the following folders:
Linux: ~/.config/ownCloud/
Windows: %APPDATA%\ownCloud\
Example: C:\Users\<username>\AppData\Roaming\ownCloud
macOS: ~/Library/Preferences/ownCloud/
Step 5: Install the Nextcloud client
Next, install the Nextcloud client. You can find the client on the Nextcloud website
The setup process is essentially the same as for the ownCloud client.
Important: If you have not removed the ownCloud configuration files, the Nextcloud client may suggest continuing to use the old ownCloud configuration. Do not use this option.
On Windows, you must also not use virtual files for this migration.
Step 6: Remove Synchronization Data
Open the previous ownCloud synchronization folder and remove the following hidden files:
.sync*.db
.sync*.db-shm
.sync*.db-wal
This will remove the local synchronization information from the previous ownCloud client.
Step 7: Transfer Files to the New Nextcloud Folder
Create a new synchronization folder for Nextcloud.
Then move all files and folders from the previous ownCloud synchronization folder to the new Nextcloud synchronization folder.
Important: The files must be moved, not copied. Moving the files preserves the necessary timestamps.
Step 8: Complete the Migration
Set up the Nextcloud client with the new Nextcloud sync folder and let the data fully sync with Nextcloud.
Depending on the amount of data and your internet connection, this process may take some time.
Important Note Regarding the Old ownCloud Sync Folder
Theoretically, you can continue to use the old ownCloud sync folder. However, based on our support experience, this often leads to confusion and problems, as it may subsequently become unclear which folder is currently being used.
We therefore strongly recommend that you completely remove the old ownCloud sync folder after the migration is complete.
Keep only the backup you created earlier until you are certain that the migration has been fully and successfully completed.
Installing and Setting Up the Nextcloud Client
Introduction The Nextcloud Client lets you sync files between your computer and your Nextcloud instance. This allows you to access your files directly from your computer and automatically sync changes with your Nextcloud.
This guide walks you through the download, installation, and setup of the Nextcloud Client step by step. We’ll also show you how to find the correct server address for your account.
1. Download the Nextcloud Client
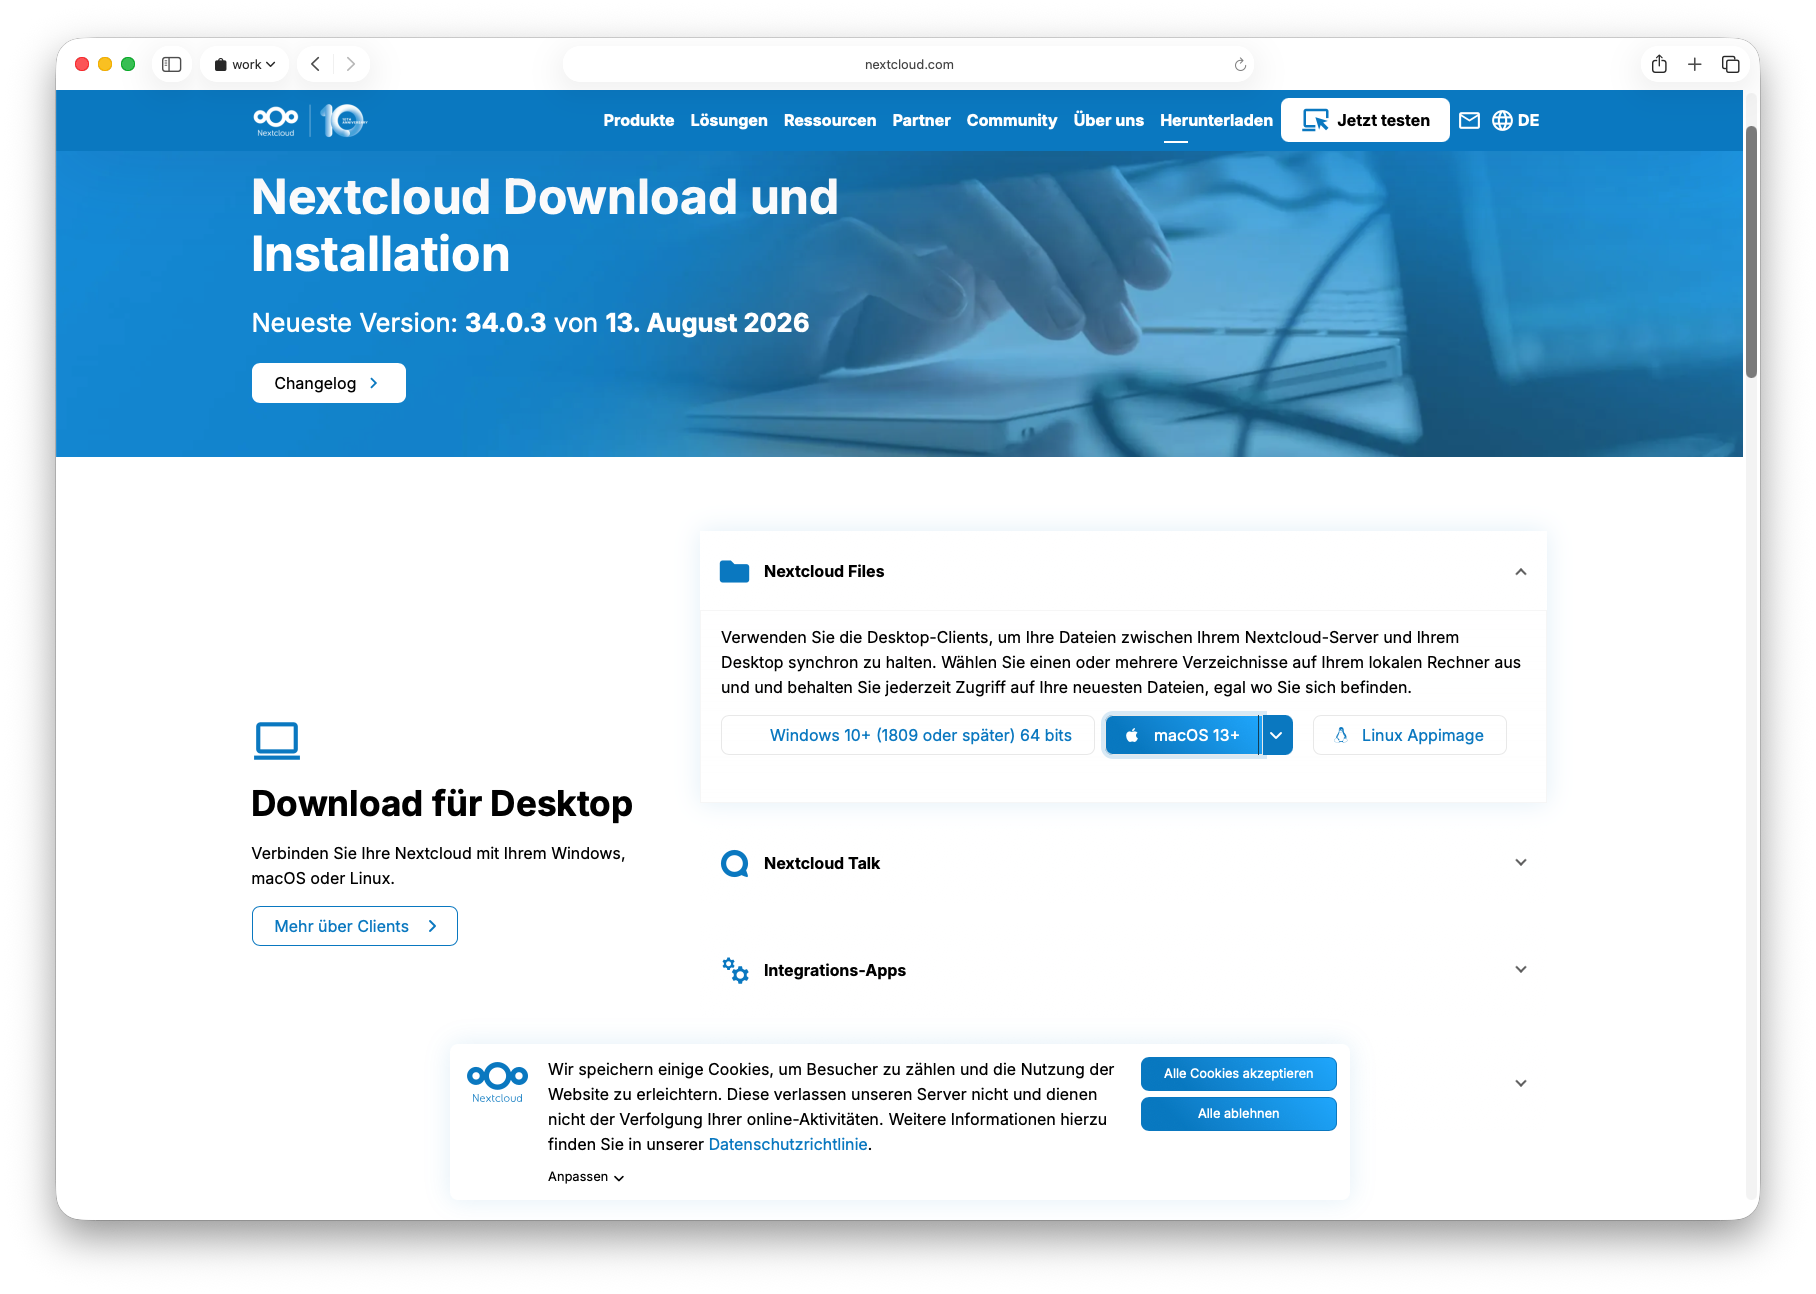
First, download the Nextcloud Client for your operating system.
To do this, go to the following page: https://nextcloud.com/de/installation/
Select the version that matches your operating system and start the download.
2. Install and Open the Nextcloud Client
Wait until the download is complete.
Then open the downloaded installation file and install the Nextcloud client on your computer.
Launch the Nextcloud client after installation.
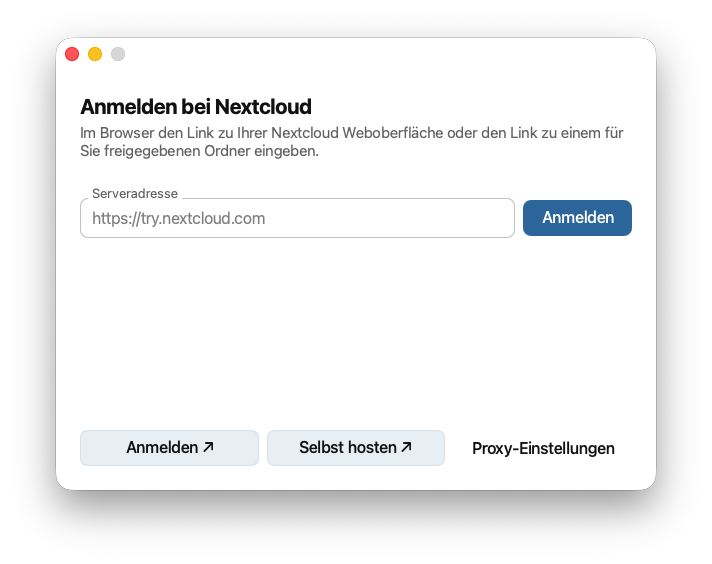
A window will open asking you for the server address of your Nextcloud.
Important if you previously used ownCloud:
If you previously had the ownCloud client installed, Nextcloud may offer to import your existing ownCloud configuration.
Do not agree to this import.
Instead, choose to set up the Nextcloud client using the server address of your Nextcloud instance.
3. Where can I find my server address?
Log in using your credentials on our central login page at files.academiccloud.de.
After successfully logging in, you will be automatically redirected to the Nextcloud instance associated with your account.
After being redirected, you can find the server address of your Nextcloud instance directly in your browser’s address bar.
Important: Be sure to copy the full address, including “https:”.

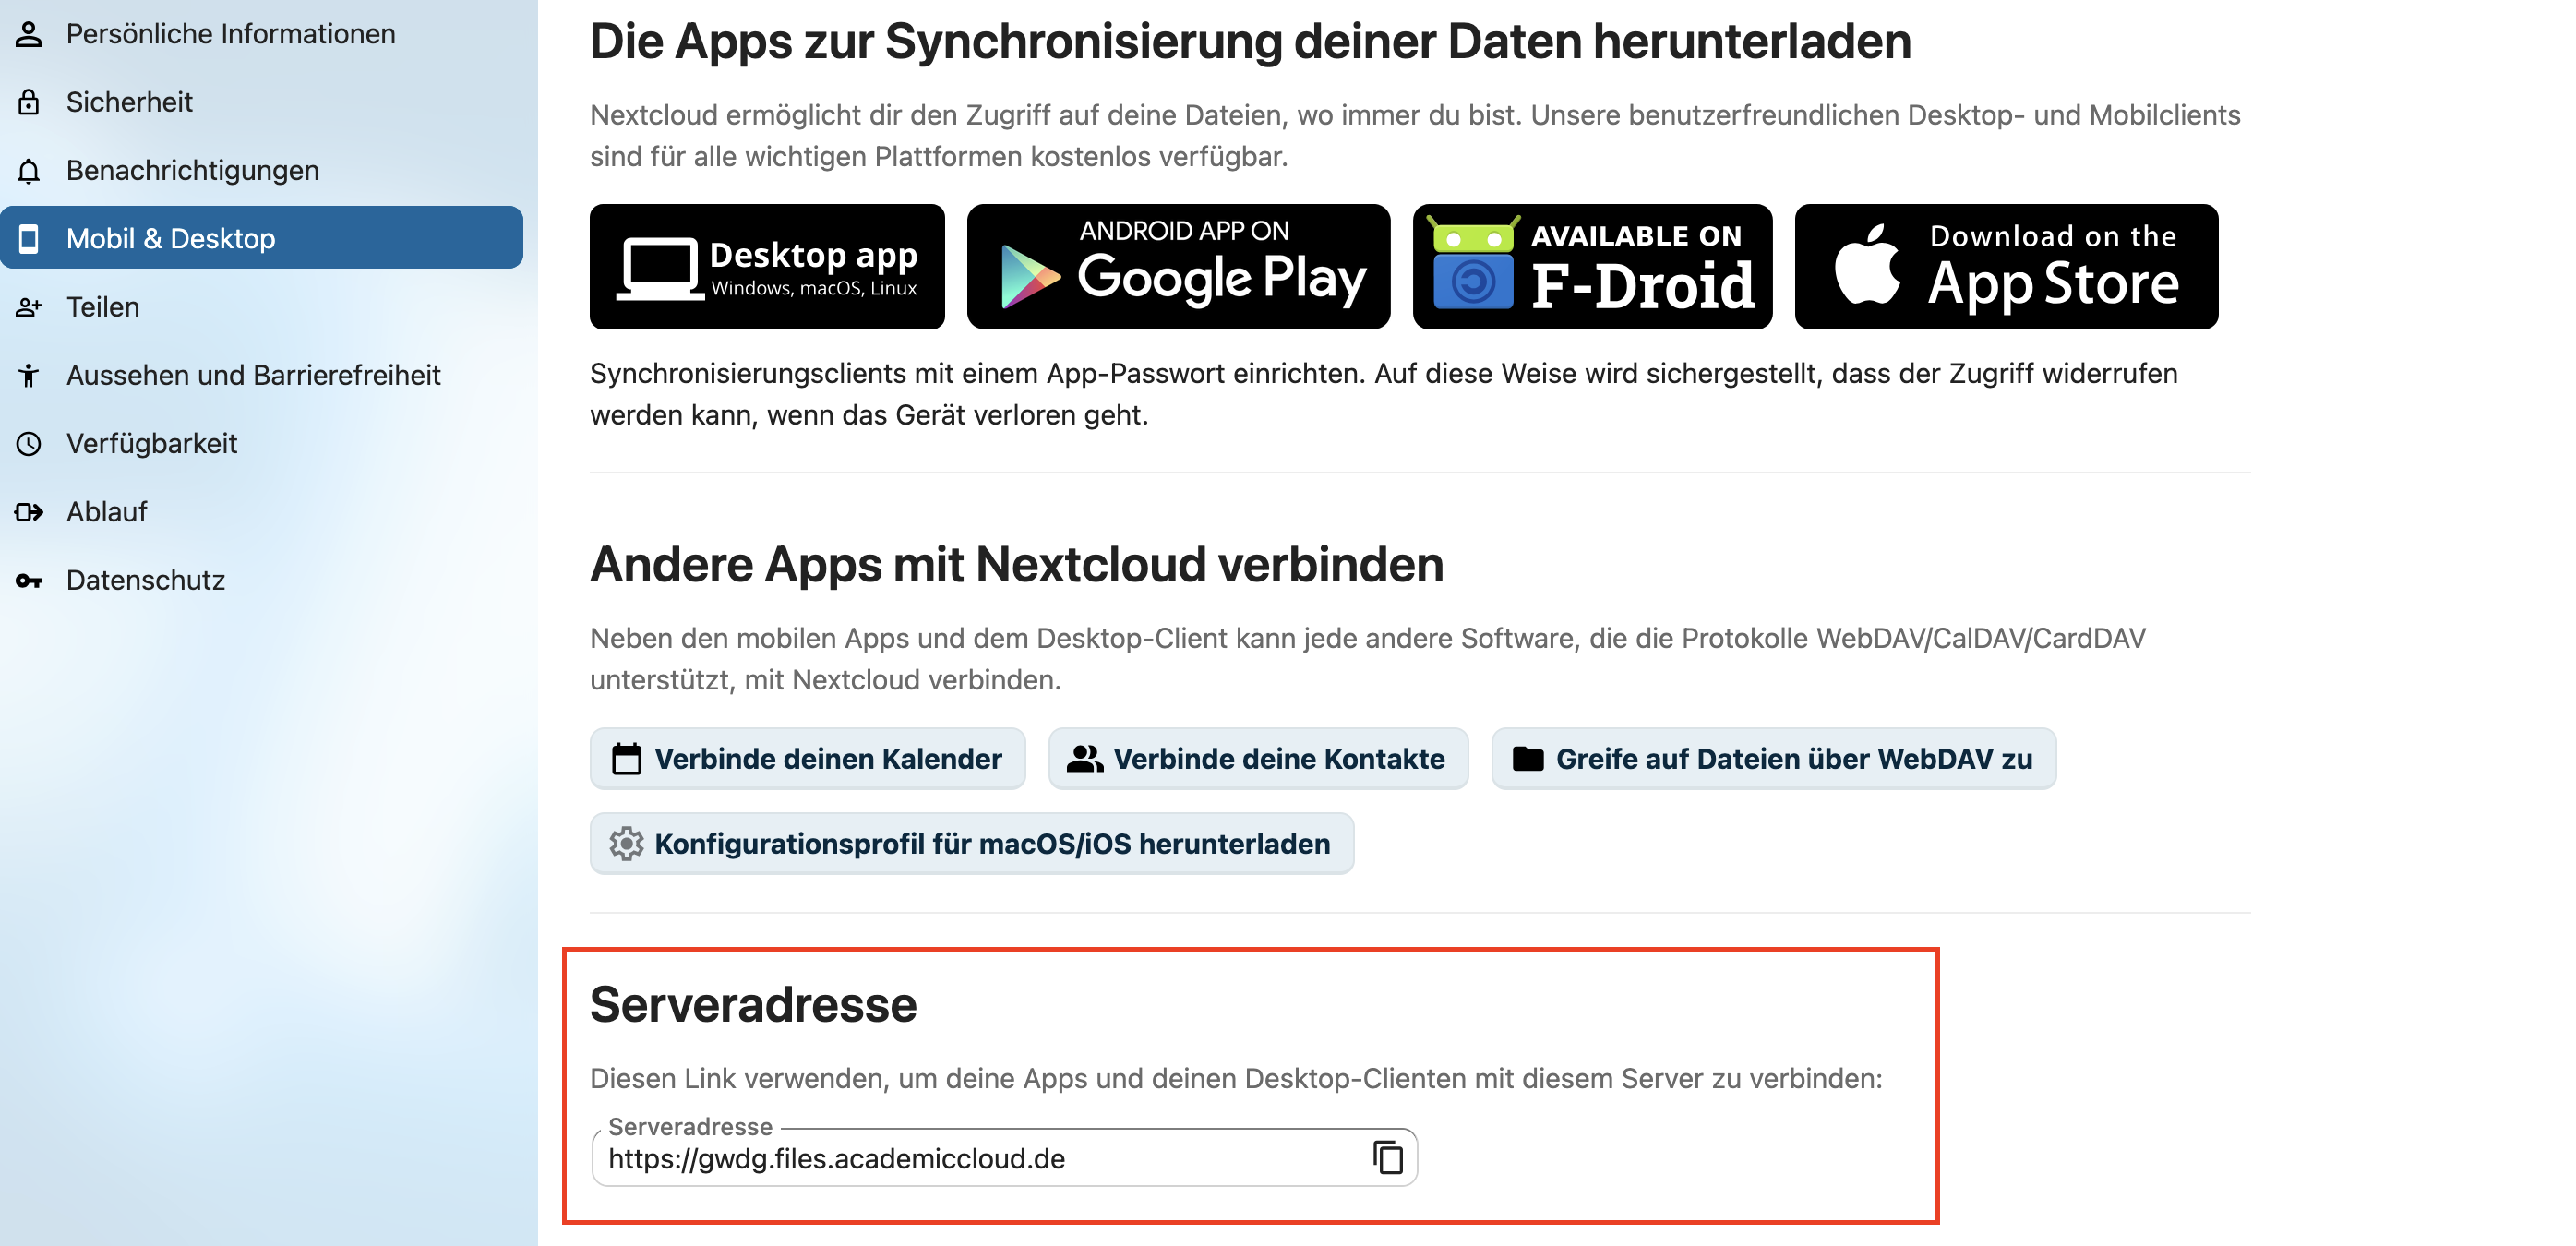
Alternatively, you can view the server address in your personal Nextcloud settings under the “Mobile & Desktop” menu item.
4. Enter the Server Address in the Nextcloud Client
Now return to the Nextcloud Client window.
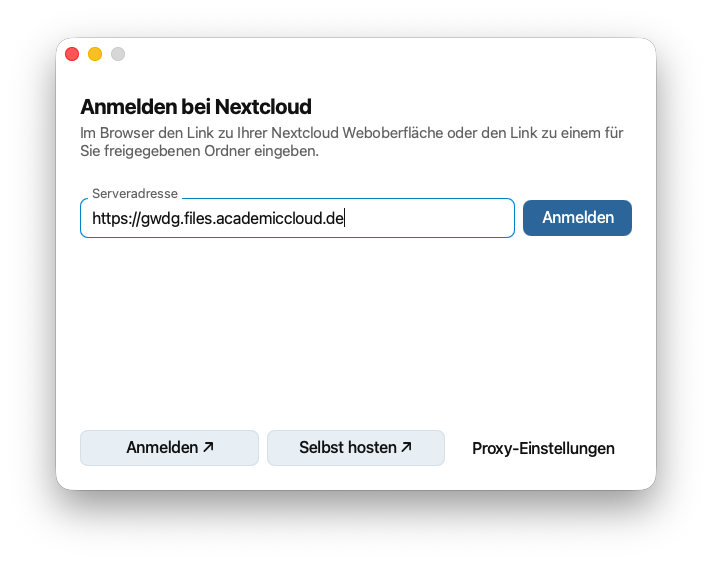
Enter the server address you determined earlier and confirm your entry.
** 5. Log in via the browser and grant access**
A new window will then automatically open in your browser for you to log in.
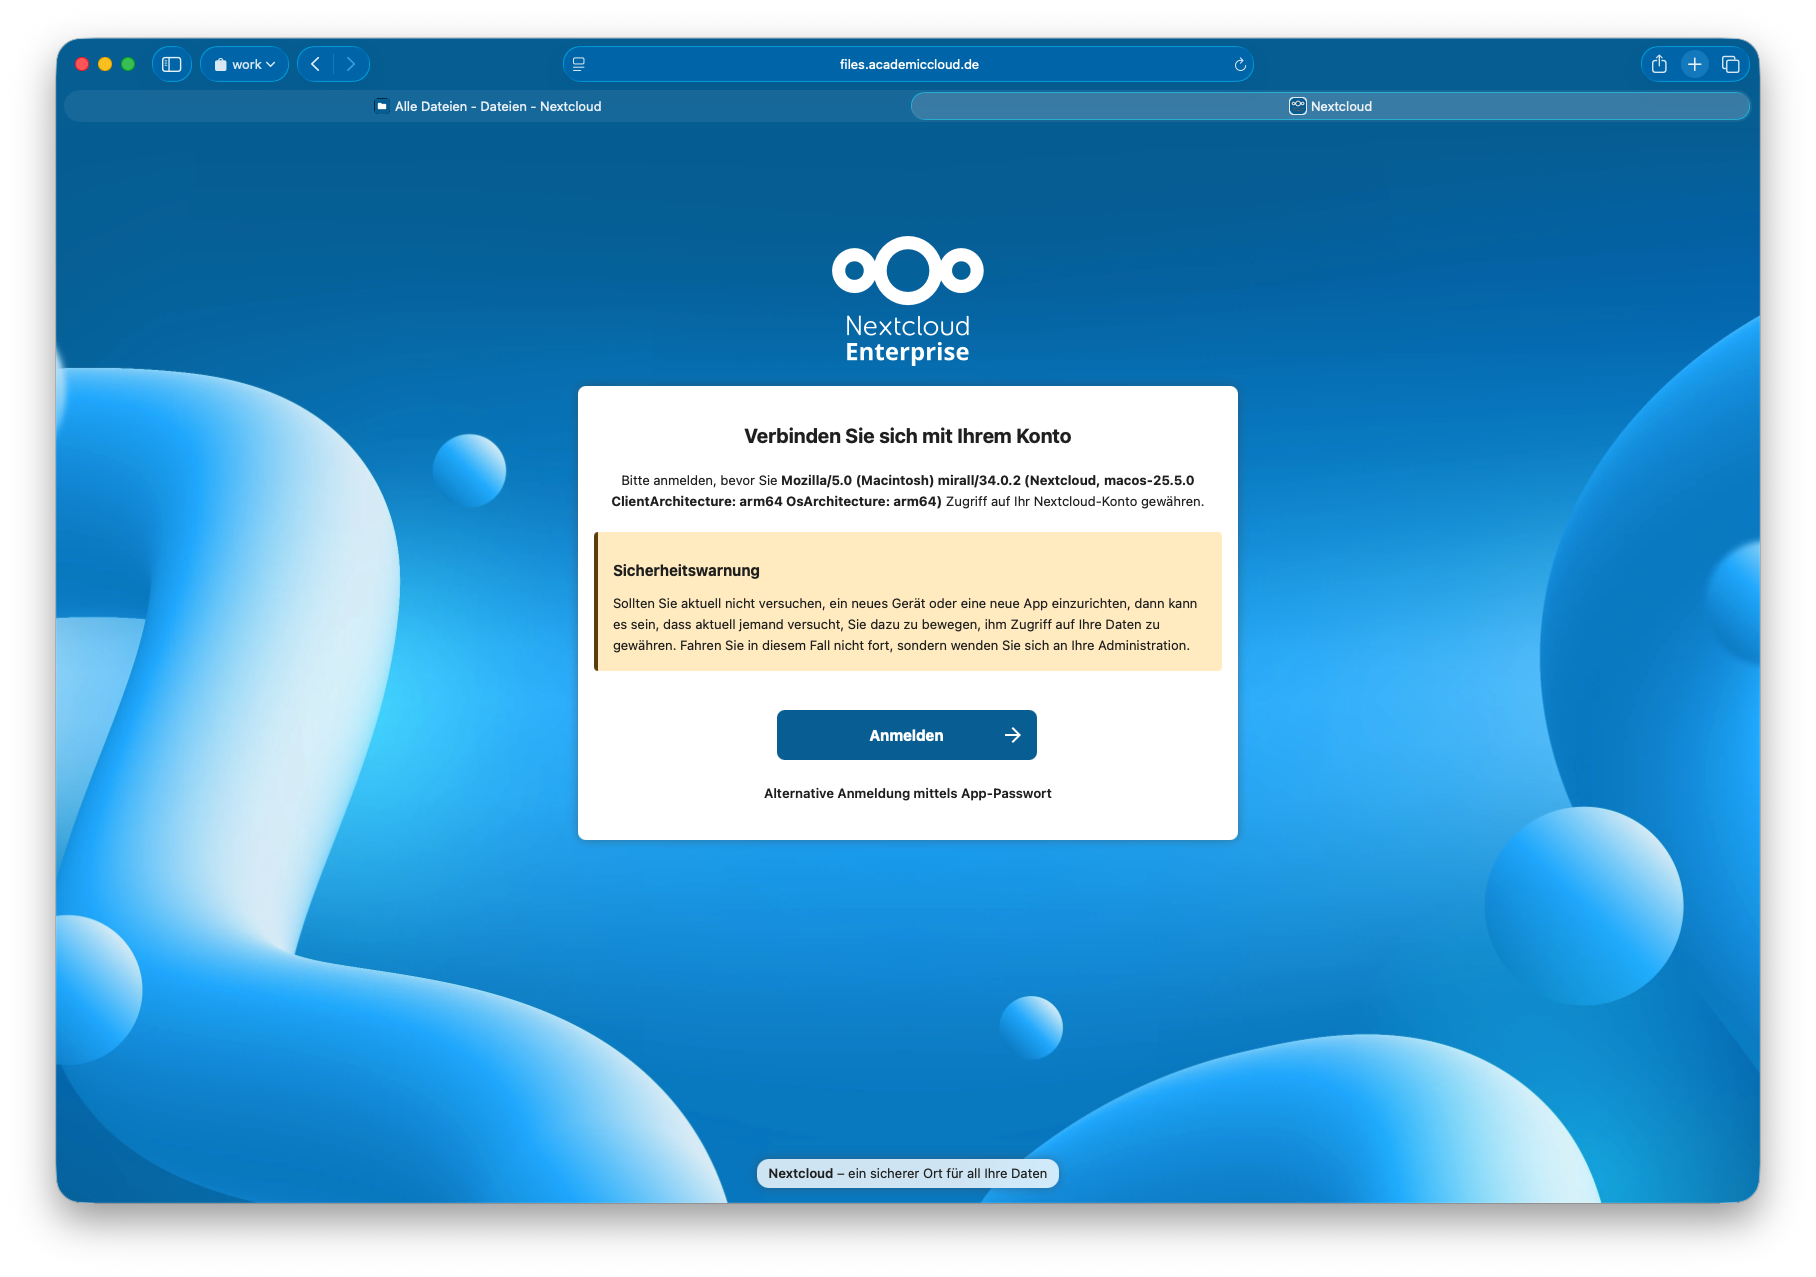
Log in there using your credentials. This grants the Nextcloud Client access to your Nextcloud account.
Note: If you previously followed the path described in Step 3b, you may not need to log in again. In this case, your login from Step 3b may still be valid.
After successfully logging in, a confirmation message will appear in your browser.
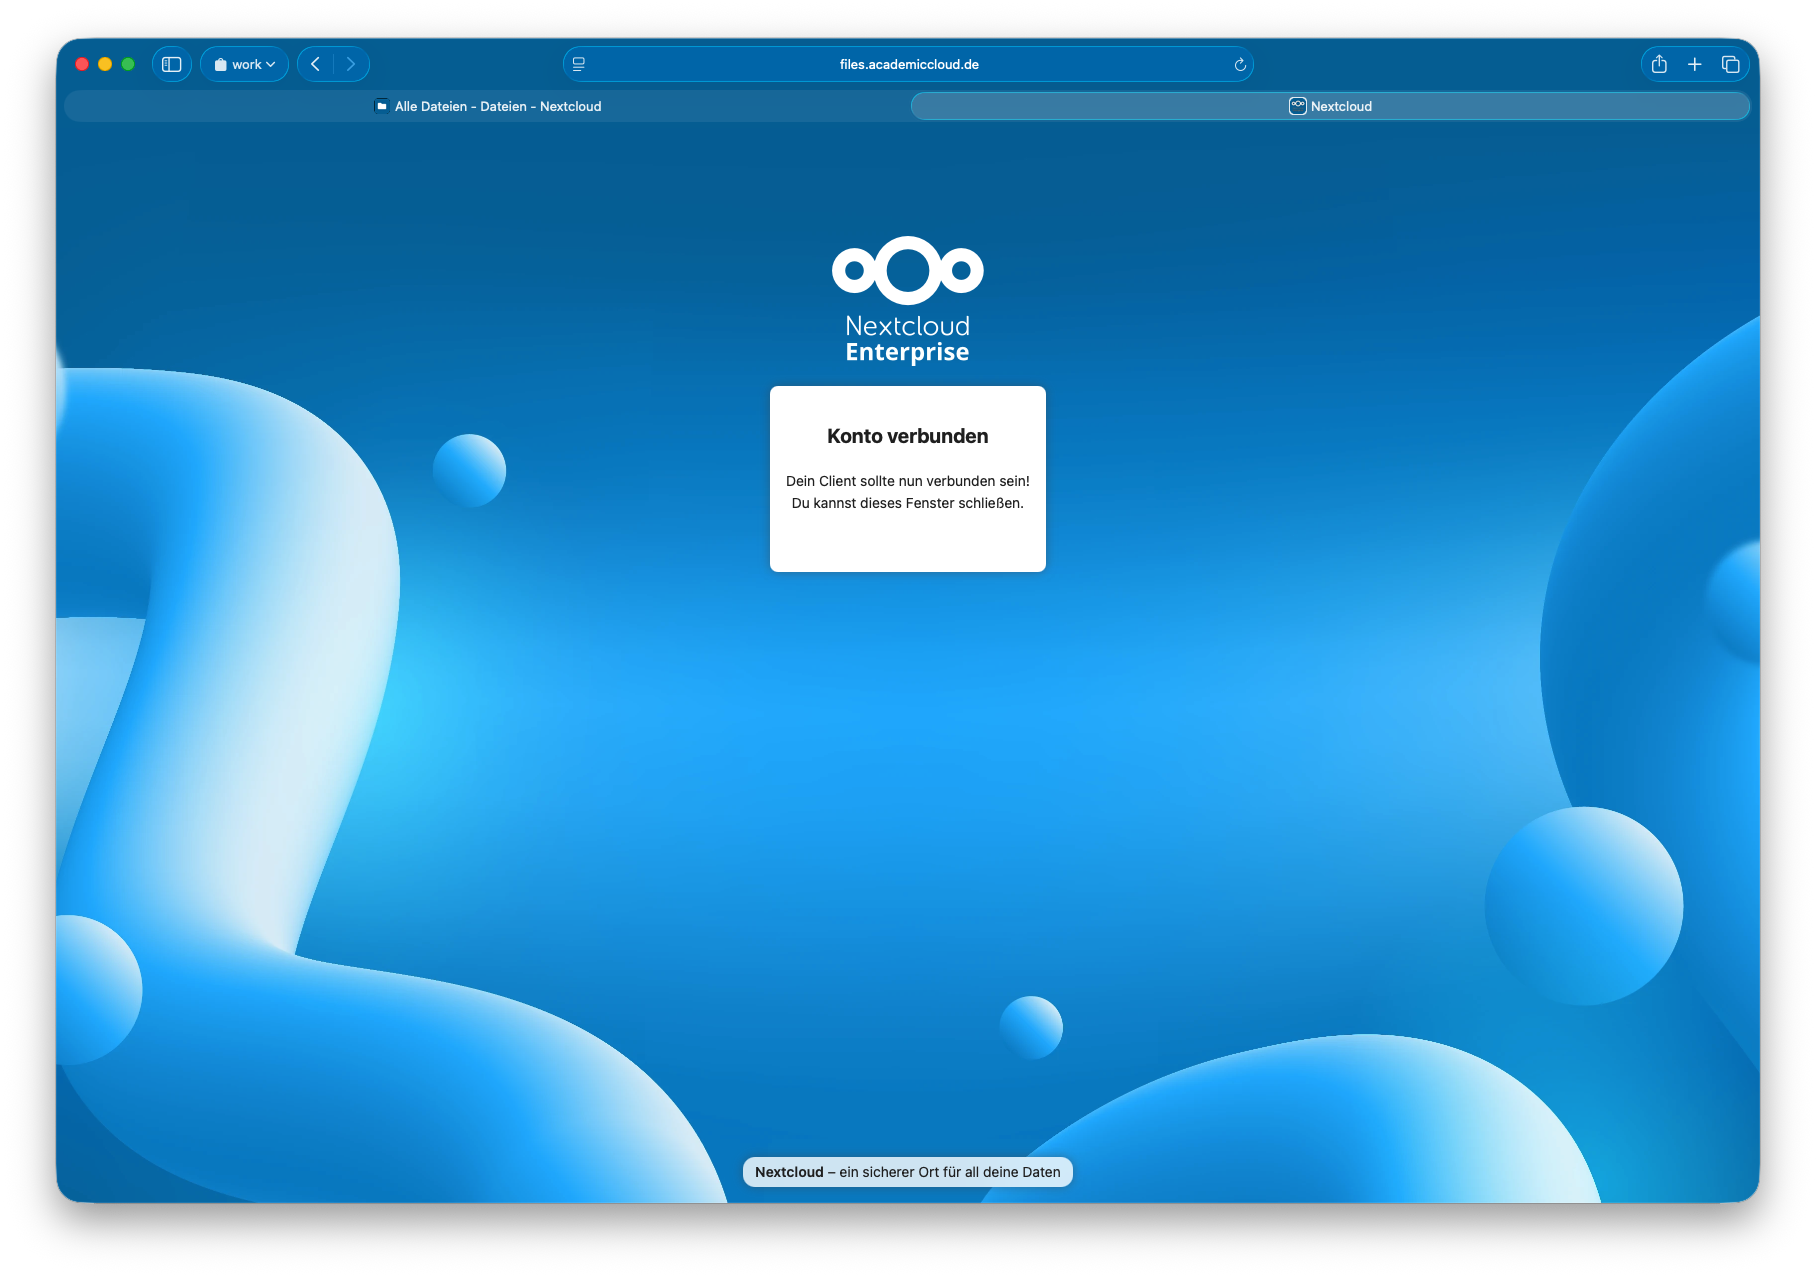
You can then close the browser window or return to the Nextcloud Client.
6. Set Up the Nextcloud Client
Back in the Nextcloud Client, you can now configure the desired settings.
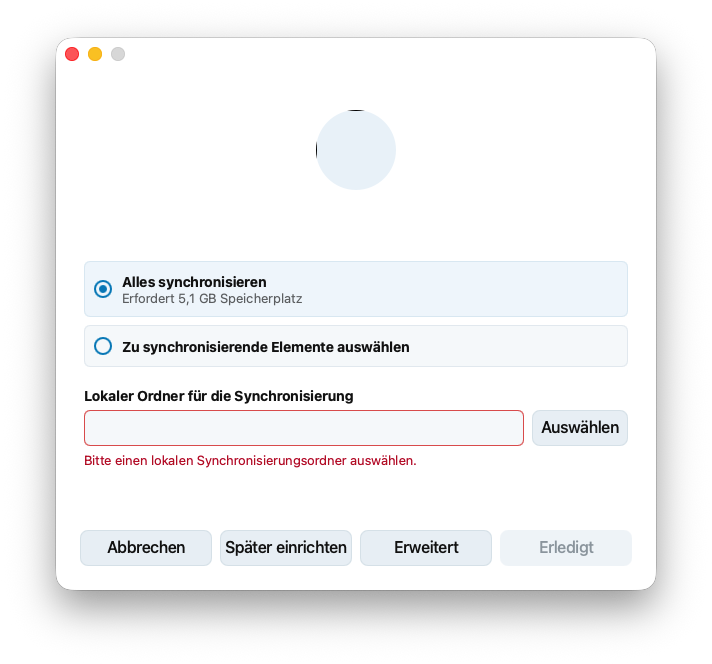
Depending on your needs, you can, for example, specify which folders should be synchronized and where the synchronized files should be stored on your computer.
Complete the setup.
Recommendation:
We recommend disabling the use of virtual files under “Advanced.”
Done! The Nextcloud client is now set up and ready to use.
Your files will be synced with your Nextcloud according to your selected settings.
Reason for the transition
The switch to Nextcloud is necessary due to changes in ownCloud and the company policy behind it. At the same time, Nextcloud offers numerous advantages:
- By enabling the setup of smaller, individual instances, institution-specific icons and color themes can be used.
- Backup options can be adapted to the individual needs and requirements of each instance.
- Additional administration access can be set up for the IT department of the respective university or institute.
Further information
Further background information can be found in our GWDG News 6|24
For questions or concerns, please open a ticket to support@gwdg.de with the subject “Question about Nextcloud migration”.
FAQ on Nextcloud and the migration tool
What should I consider if I own a large share that others are working on?
Please coordinate within your group and with your colleagues before starting the migration.
Only once the owner starts the migration will the shares become usable again for the others.
Note that shares in ownCloud will be set to “read-only” after migration. Joint editing in ownCloud will no longer be possible.
I have data in GWDG-ownCloud and in AC-ownCloud – what happens during migration?
If you use both systems, it is essential that you pay close attention to how you name your files and directories.
If files have the same name, a naming conflict will occur. In this case, the file from the instance that was migrated first will be retained. The file with the same name from the second instance will not be migrated and will therefore be discarded.
This means: For example, if you first migrate the GWDG ownCloud and then the AC ownCloud, the file from the GWDG ownCloud will be retained in the event of a naming conflict. The corresponding file from the AC ownCloud will not be transferred.
Recommendation: Before the migration, rename files and directories so that no naming conflicts arise between the two systems. This ensures that all desired data is migrated.
What happens with data that is not migrated automatically?
- Public links: All previous ownCloud links will become invalid, as the URLs change.
- Files shared with you by other users: These will only be available once the owner has carried out the migration. To assist you, the file `migration-info.txt` will be provided in the root folder of your Nextcloud after migration, listing all non-transferred shares.
- External drives: Files in mounted external drives will not be migrated. External drives must be reconnected in Nextcloud.
- Calendars (e.g., appointments): Can be downloaded from the settings in ownCloud as an ICS file and then imported into Nextcloud or other calendar services.
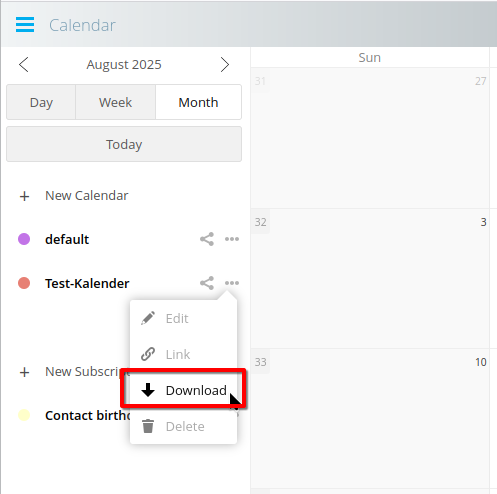
- Contacts: Can be exported as a VCF file and re-imported elsewhere.
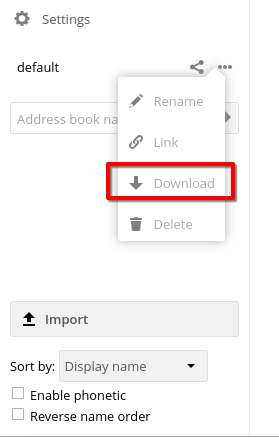
How does sharing work across different Nextcloud instances?
Group shares do not work across instance boundaries.
Example:
- Group with three members: A, B (on `gwdg.files.ac.de`) and G (on `guest.files.ac.de`).
- If A shares with the group → only B sees the share, but not G.
- If G shares with the group → nobody sees the share.
This problem only affects groups. You can still share data with individual accounts on other instances without issue.
How do I access files that were shared with me?
Once the owner of the files has completed the migration, the shares will also be transferred. From that point on, you will automatically regain access to the files shared with you.
Note: In groups or teams with many shares, it makes sense to coordinate and plan the migrations together.
Do I need to install a new client on my computer?
Yes. The previous ownCloud clients are not compatible with Nextcloud.
Please install the Nextcloud client to continue synchronizing. You can find the client on the Nextcloud website
Can I just rename the ownCloud folder on my PC and continue using it?
We do not recommend doing this. The reason is that the file access times are important for synchronization and should not be altered by a copy operation or other interventions. The client uses this information to determine which file was last modified and in which direction the synchronization should take place.
If there is no other option, please contact someone familiar with rsync or email our support team at support@gwdg.de.
What happens to my ownCloud account after migration?
- All shares and public links will be set to “read-only.”
- If you still need write permissions, you can change this manually – but then you must ensure that changes are transferred again by yourself.
- After the migration is complete, you will have at least one month to review the transferred data. After that, all files in the source account will be deleted.
If you need your account for a longer period, please contact our support in time at support@gwdg.de.
I have included links to my data in a publication. These must remain available – what should I do?
Please note: Public links change with the transition to Nextcloud and therefore will not remain permanently valid. For long-term referencing of scientific data (e.g., over 10 years), you should use a Persistent Identifier (PID).
If you have linked to your ownCloud data in a publication, please contact our support team and open a ticket. We will work with you to find possible solutions.
Why can’t I access the Nextcloud migration tool as a member of Technische Universität Braunschweig?
If you are a member of Technische Universität Braunschweig and receive the following error message when using our Nextcloud migration tool:
“Your account is not authorized to use this website. If you have any questions, please contact [support@gwdg.de](mailto:support@gwdg.de).”
Please do not contact GWDG Support, even though this is stated in the error message.
Instead, please contact the local IT support at Technische Universität Braunschweig.
Accounts belonging to Technische Universität Braunschweig are rejected by our migration tool because no valid target instance is configured for these accounts to which the data could be migrated.
The migration must instead be coordinated and carried out through the local IT support at Technische Universität Braunschweig.
How do I log in to the Nextcloud app?
Unlike with the Nextcloud desktop client, you do not need to enter the address of your specific Nextcloud instance as the server address in the Nextcloud app.
Instead, use the general server address: files.academiccloud.de
After entering the server address, a login window will open. Log in there using your credentials. Once you’ve successfully logged in, the app will automatically be assigned to the Nextcloud instance associated with your account.