Table of Contents
IdM-Portal documentation
Overview
This page serves as an introduction for the use of the IDM-portal.
The portal is available at https://idm.gwdg.de. Log in is possible via LDAP with your username/e-mail address or via Single Sign-on (SSO). The portal is available in English or German. The language can be changed in the top right corner.

The navigation menu is on the left side. The menu is divided into Workspaces and Actions. Each workspace is a separate environment where different types of objects like users or distribution groups can be found. Available actions such as search or create always refer to the currently selected workspace.

User management
Search
The search-function allows you to find objects in the current workspace.

If you wish to search for objects based on specific attributes like username, e-mail address, user status etc., you can use the Advanced Search, which is located in the second tab.
For some attributes, a value has to be selected (e.g. user status).

The * character can be used as a wildcard, but only with the operator: equal. You can use “username equal *” if you want to find all available objects.
For a more complex search, you can append multiple search rows by clicking the + sign next to the Search button. These search rows are linked by And or Or, as shown at the end of the search row on the right side. By clicking on the button, you can toggle between those two options.

Search results
A list of objects will be shown after submitting the search form.

You will be redirected to the edit page if only one object was found.
The search result list contains a subset of the objects attributes. The shown attributes can be customized in the personal settings. A user can be edited by clicking the edit button on the right. Below the search condition are links to copy the result to clipboard, export to excel/csv and to open a print view.
Edit
After switching to the edit page, new actions specific to the currently selected object appear on the left side menu. Attributes of a selected object are categorized into groups like general user data or Email. You can show/hide a group by clicking on the + or - Symbol on the right.

History
By clicking the history action, attribute and password changes can be reviewed.

Changes that were made by the system are marked as “(idm-internal)”.
The second tab shows the login history of the object, if applicable.
Personal settings
The personal settings menu allows you to change how search results are displayed. You can find the Personal Settings page by opening the menu in the upper right corner, next to your name.

You can add and remove attributes in the list to change the layout of the search result table.

Application Credentials
The Application Credentials page allows you to create Credentials for your account that work for a certain service only. You can think of them as sub-accounts to your account.
You can find the Application Credentials via the account menu.

Select a service you want to add credentials for, for example the IdM API. After creating a new Application Credential, you will be able to use it with the specified service only, and you can deactivate or delete the Application Credential at any time.

Special attribute descriptions
Email forwarding
Two attributes can be used to forward incoming mails: routing addresses and exchange redirect address. If the user has an exchange mailbox you should use the exchange redirect address, otherwise use routing addresses.
| Name | Multiple values | Forward internal sent emails |
|---|---|---|
| routing addresses | yes | no |
| exchange redirect address | no | yes |
If the source and the target mailbox are within the same Exchange organization the mail is delivered directly into the target mailbox which prevents the routing addresses attribute from taking effect.
Visibility in Exchange addressbook
By default, all users are displayed in the Exchange address lists. To change this setting check the hide from address lists checkbox.
When using the Exchange cache mode with an Outlook client, the updating of the address book can take up to 48 hours. Outlook Web Access under https://email.gwdg.de instantly shows the changed settings.
Remove Active Directory short time lockout
The Active Directory automatically locks a user account for a certain time (usually 30 minutes) if the password is entered incorrectly for 3 times. To remove this lock the corresponding short time lockout (AD) checkbox must be unchecked.
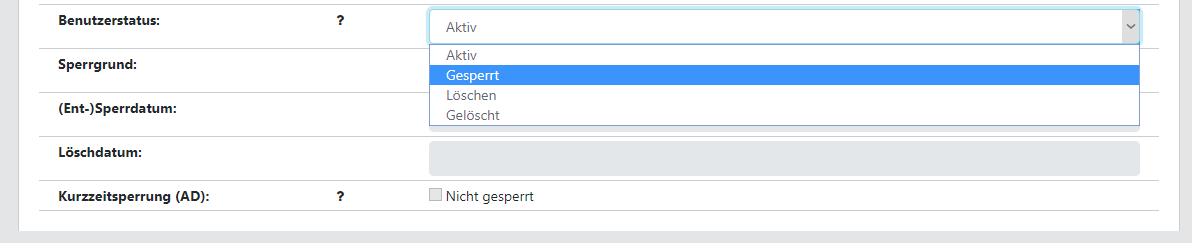
Enable/Disable
You can enable and disable accounts by changing the user status. Send an email to support@gwdg.de if you want to reactivate a deleted accout.
Delete
Users can be deleted by activating the deferred deletion. An information email is sent to the user regarding the deletion of the account. The user will be automatically set to status delete after 14 days.

Expiration date
You can set an expiration date for users. The deferred deletion will be activated when the expiration date is reached.

Password
Change
Passwords are set as an initial password according to the following table. Initial passwords expire 14 days after password change. The user will be disabled if the password is not changed within this period.
| Organization | Initial password | Expiration | Notification |
|---|---|---|---|
| All | yes | 14 days | 7 days before expiration |
| UNI | no | 1 year | 4 weeks before expiration weekly, 7 days before expiration daily |
| MPG | no | never or upon request |

Generate and print
You can also generate a random password by clicking the Generate button. You must save or save & print the password afterwards.

A PDF document will be generated and opened if you choose Save and Print.

The template for the generated PDF file can be set individually for each institution. If you desire to use a non-standard template, write a mail to idm-support@gwdg.de. The template should be created in the docx format. As placeholders the following values can be used: first name, last name, username, password
Distribution list management
Distribution list overview
Currently there are three different types of distribution lists: LDAP distribution list, static Exchange distribution group and dynamic Exchange distribution group.
LDAP distribution list
- May contain external email addresses
- Not visible in the Exchange addressbook
Static Exchange distribution group
- May only contain members within the Exchange organization (inlcuding email enabled users)
- Visible in the Exchange addressbook
- Members are shown in addressbook
- Send permissions can be defined
Dynamic distribution group
- May only contain members within the Exchange organization (inlcuding email enabled users)
- Members are added automatically based on a specified filter expression
- Send permissions can be defined
- Can be shown in Exchange addressbook
Group management
- Can act as a Static Exchange distribution group
- Visible in the Exchange addressbook
- Members are shown in addressbook
- Send permissions can be defined
- Editing can be limited to certain user
Create
To create a distribution list you must first choose the desired workspace (LDAP distribution list, Exchange distribution groups (static), Exchange distribution groups (dynamic); see above) and click create.
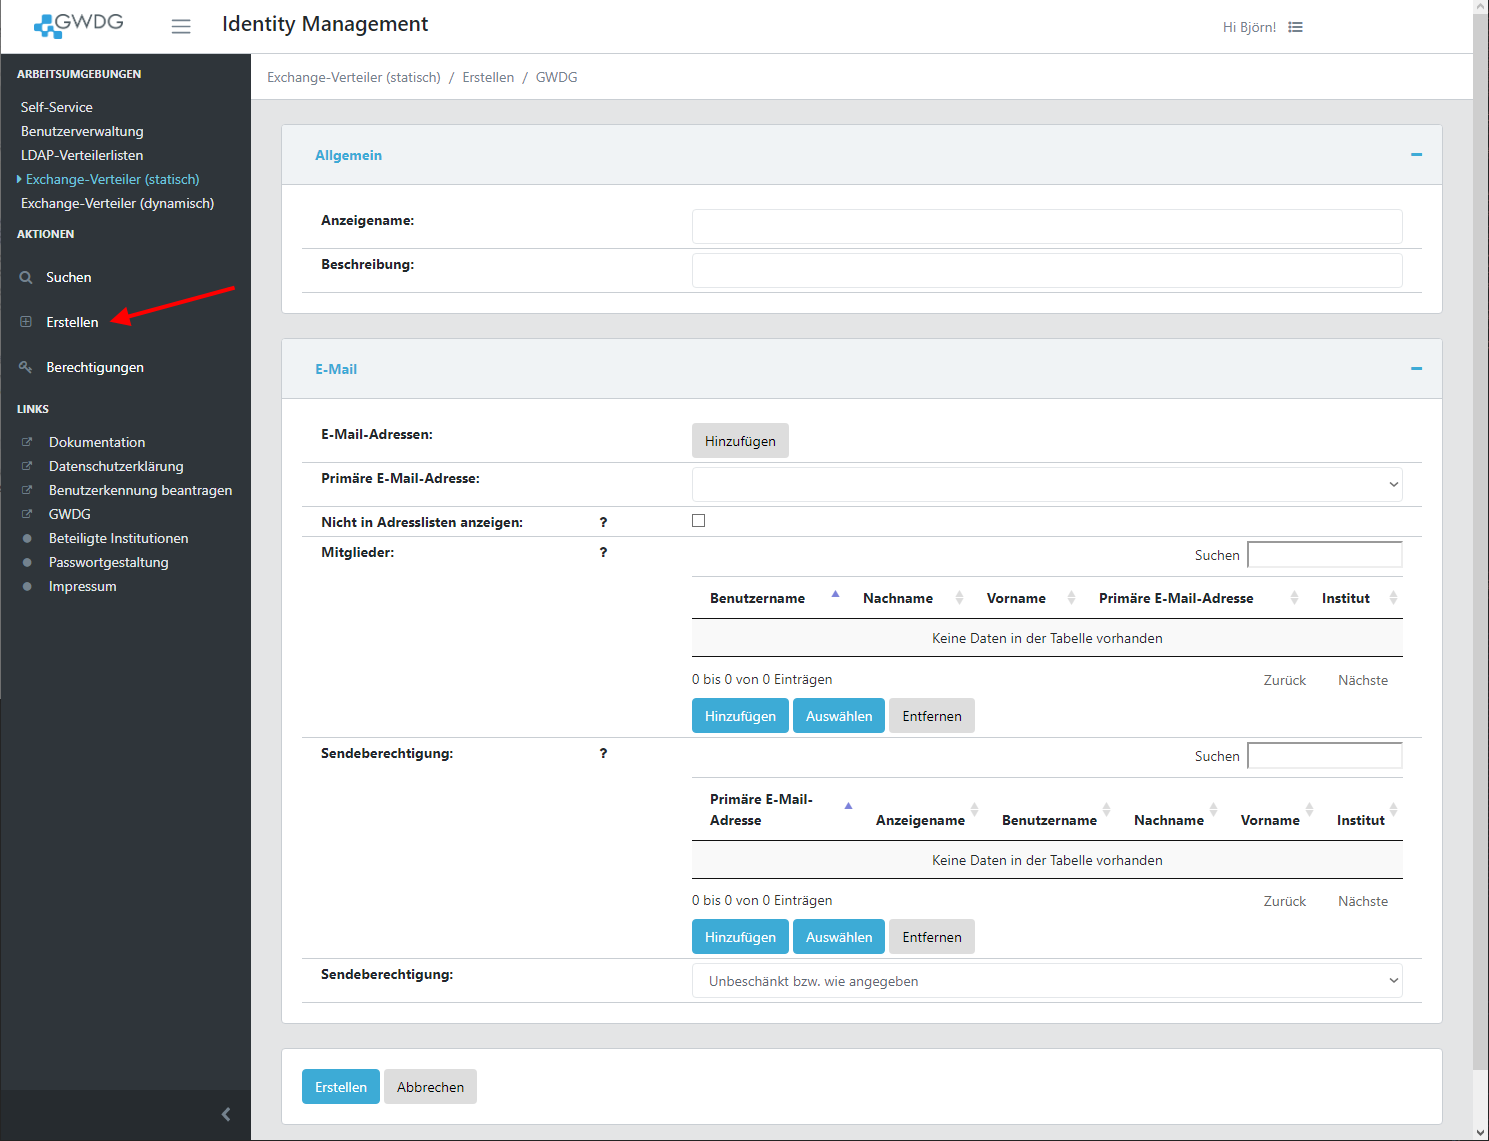
See the documentation for the chosen distribution list type for further info.
Delete
Switch to the edit view of a distribution list. There you can click the delete action on the left.
Be aware that the deletion is immediate and a deleted lists can not be recovered.
Static Exchange distribution group
Add / Remove members
A user can be added by clicking the Add button and insert the username or email address.
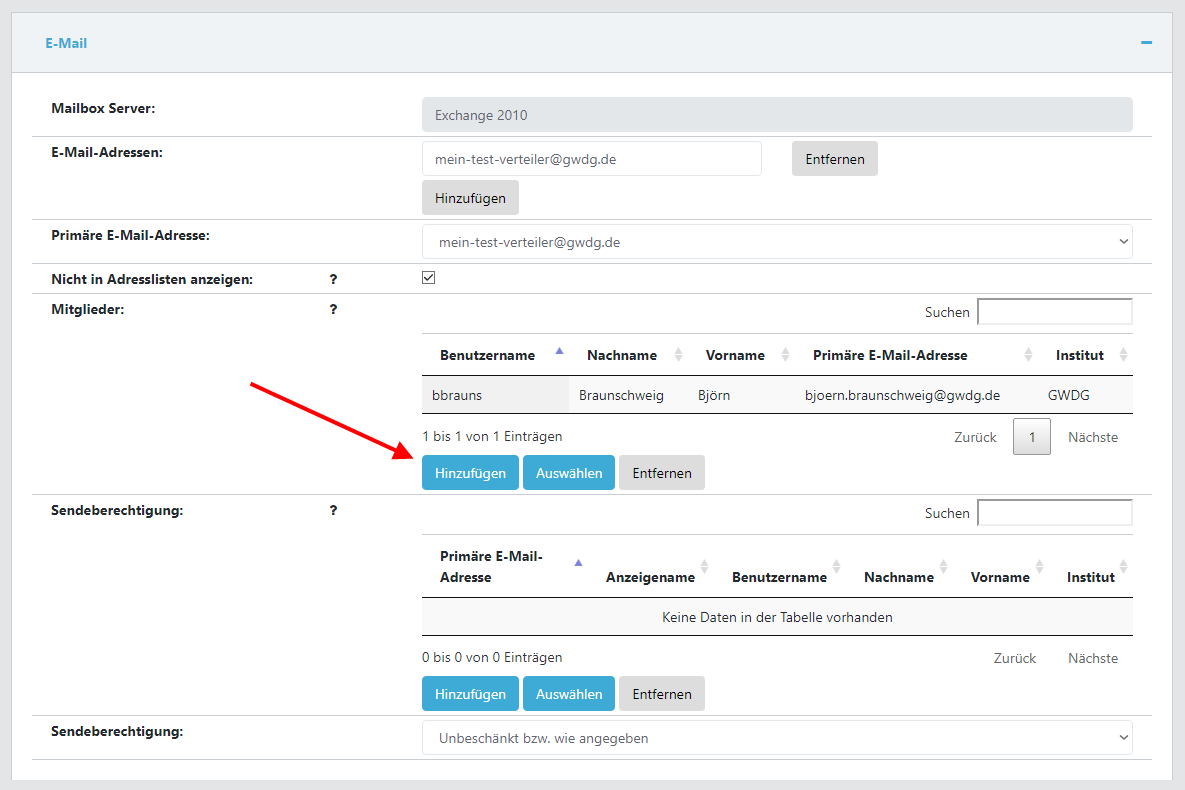
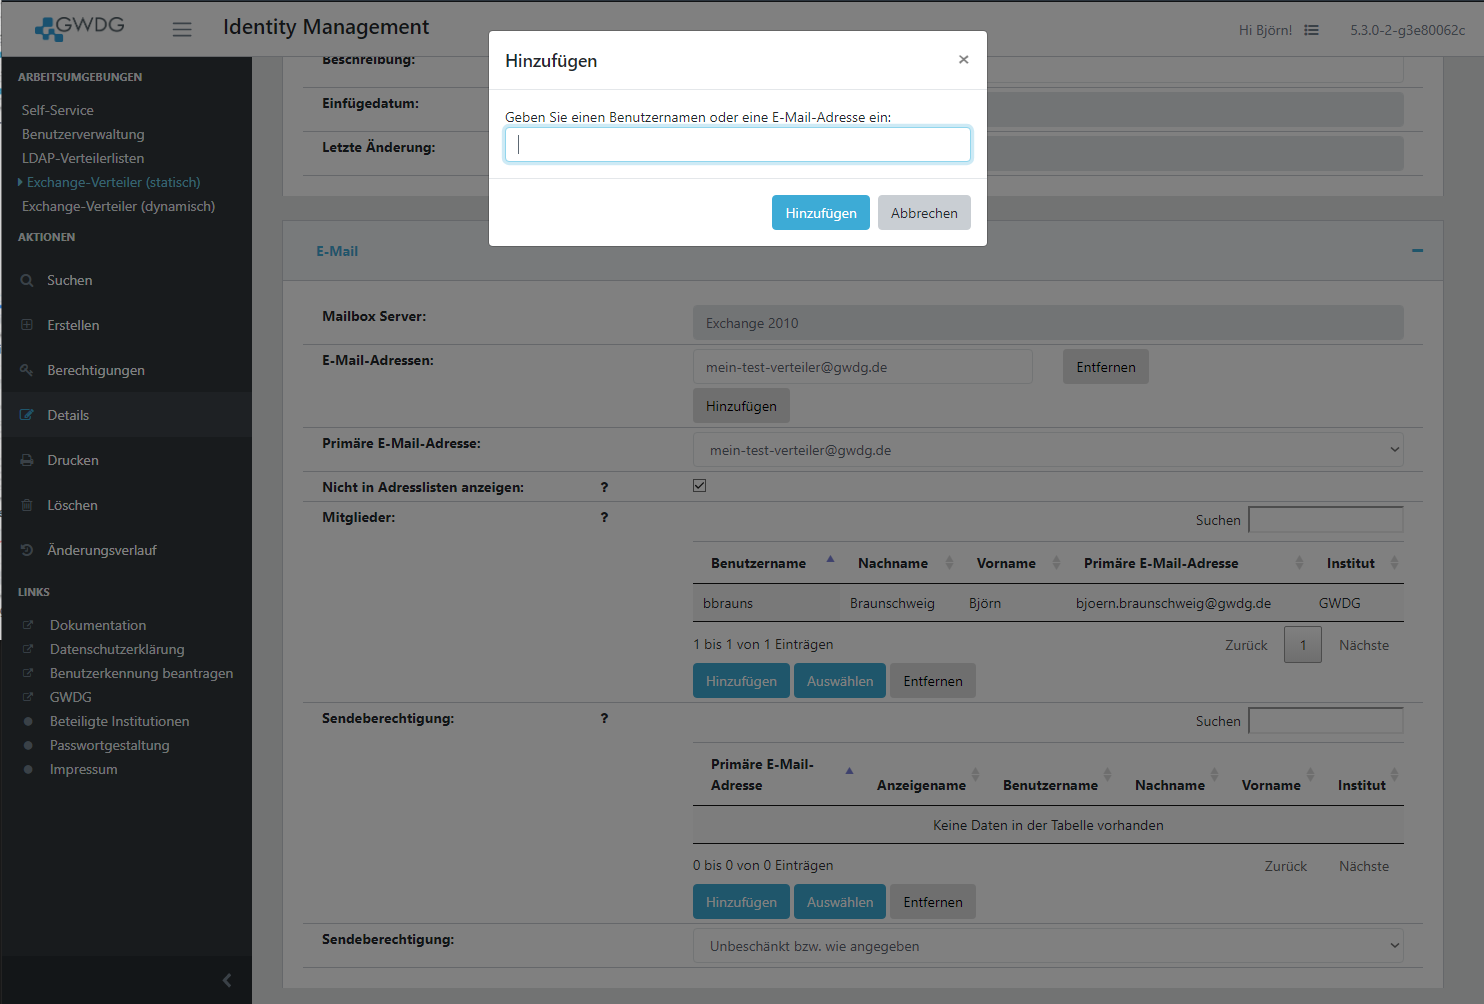
Alternatively you can open a search form by clicking select if you don't know the username or email address.


Members can be removed by selecting them in the grid and clicking the remove button.
Send permissions
You can set send permissions to control who can send to the list. Users who are not allowed will receive a notification email if they try to send to the list. You can choose between different settings:
- Unrestricted or as specified (default): Everybody is allowed to send to the list if the send permission list is empty. Otherwise, only the specified users/groups are allowed to send to the list.
- Organization: All users of your organization with an Exchange mailbox or email enabled users are allowed to send to the list.
- Institute: All users of your institution with an Exchange mailbox or email enabled users are allowed to send to the list.
Dynamic Exchange distribution group
Overview
Dynamic Exchange distribution groups are used to add members based on a filter expression. This filter specifies which attribute values an object needs to be part of this group (e.g. all objects with the attribute “department” set to “A”).
You can easily create a distribution group for all members (normal user) of the department “AG I” by using the filter:
$usertype -eq '0' -and $department -eq 'AG I'
All new staff will automatically be added to this group if the department is set to AG I.“
When using multiple filters be aware of logical interpretations of those filters and its grouped components. Using parentheses might be very useful or even necessary!
For example: Addressing all normal user in two departments.
False: just lining up each expression:
$usertype -eq '0' -and $department -eq 'AG I' -or $department -eq 'AG O'
This will address all normal user for the department 'AG I' but for 'AG O' it will also address all other possible user types (including distribution lists).
Right: To ensure only normal user are addressed in both departments the conditions need to be separated and grouped.
$usertype -eq '0' -and ($department -eq 'AG I' -or $department -eq 'AG O')
or, without parentheses, be defined for each condition:
$usertype -eq '0' -and $department -eq 'AG I' -or $usertype -eq '0' -and $department -eq 'AG O'
The Filter uses the OPath-Syntax: $variablename -operator 'value'.
You can use parentheses for complex filters as well.
Supported variables
| Variable | Description |
|---|---|
| $department | Department |
| $title | Job title |
| $usertype | User type (0 = normal user, 1 = time based user, 2 = course user, 4 = function account) |
| $userstatus | User status (0 = active, 1 = disabled, 2 = delete) |
| $gender | Gender: Valid values are (M/W/D), for example: $gender -eq 'W' |
| $institute | Institution |
| $filterattribute1 | User defined attribute |
| $filterattribute2 | User defined attribute |
| $filterattribute3 | User defined attribute |
| $emailaddresses | EMail addresses have to be defined in the following way, for example: $emailaddresses -eq 'example@gwdg.de' |
Valid operators
| Operator | Description |
|---|---|
| -eq | Equal |
| -ne | Not equal |
| -like | Like (Wildcard: *) |
| -and | And |
| -or | Or |
| -not | Not |
Group management
Overview
If you don't provide an email address, groups are just a structural organisation tool. When an email address is given, they turn into a Static Exchange distribution group. When 'Only editable by “Managed by”' is checked, editing of the group is limited to the selected users.
Be aware that 'managed by' can exclude and lock out the creator of the group. Avoid to add other groups or distribution groups as 'managed by'. Privileges for editing are not derived to their members.