Outdated: Connect by using the integrated VPN Client
The GWDG strongly recommends using the Cisco AnyConnect VPN. Therefore, the use of the VPN solution integrated in macOS is not advised. click
Attention: This method is only compatible with vpn.gwdg.de and does not work with the alternative Gateways vpn-b.gwdg.de and vpn-c.gwdg.de
With Mac OS X Snow Leopard (10.6) or later, you can use the built-in VPN client directly.
1. Open System Preferences and click on “Network”. If the lock icon in the bottom left corner is still “closed”, click on it and enter your administrator password in the appearing window.
2. Click the plus icon to add a new connection.
3. Click “VPN” → “VPN Type” → “Cisco IPSec”.
4. For “Service Name”, you can enter a random name.
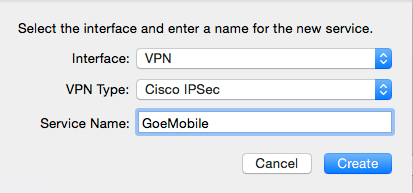
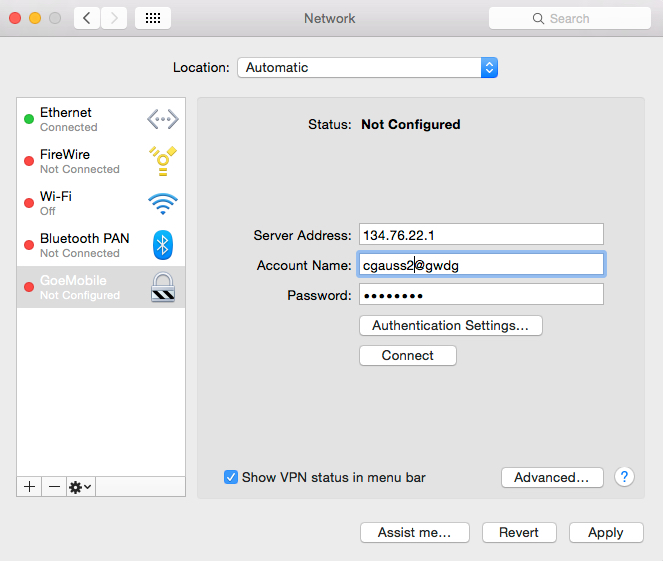
5. Click “Create”. You can now select the new connection and enter the server address: 134.76.22.1
For the “Account Name” enter your GWDG account. Employees use the extension “@gwdg”, while students use “@gwdg-stud”. Additionally, you should enable “Show VPN status in menu bar”.
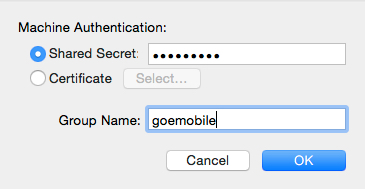
6. Now click on the button “Authentication Settings” and type “goemobile” as the key. As group name, use “goemobile” as well.
7. Now you can establish a VPN connection by clicking “Connect”.
8. If you have enabled the VPN status in the menu bar, you can always start and exit the VPN connection with GoeMobile by clicking on the corresponding icon.
9. For logging in to VPN, you must authenticate yourself. Students type their username as “firstname.lastname@gwdg-stud”, while GWDG accounts are entered as “username@gwdg”.
Be sure not to type “.de” at the end!