Table of Contents
Create and Manage Instances
This manual provide a quick help on how to create, delete, and resize your instance using Instances Dashboard.
To login:
Authenticate using: Keystone Credentials
Domain: gwdg
User Name: your academic email (e.g. myname@gwdg.de)
Password: your Password
Create your first instance
In GWDG horizon dashboard, you can create a virtual machine by following these steps:
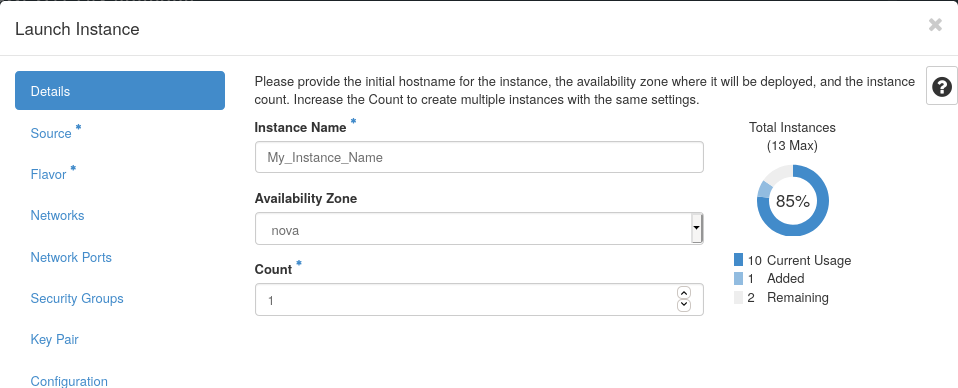
1- From the left menu bar, select project→compute→Instances and then click “launch Instance”.

2- Determine an instance name and click “next”.
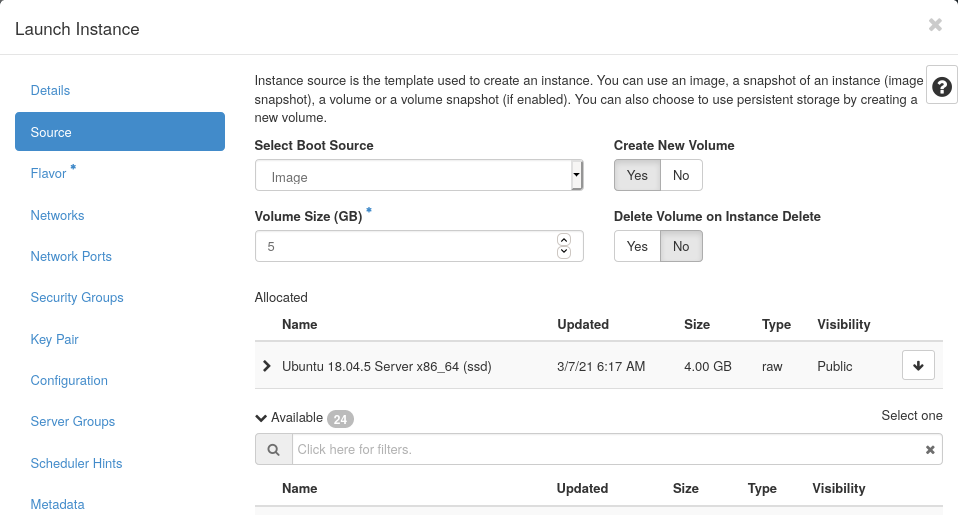
3- For the source of an instance, there are several options:
- Image with a root volume:
- From “Select Boot Source”, select image (or instance snapshot if you have one).
- Set “Create New Volume” to Yes.
- Select your desired image from the ones with “(ssd)” in their name. The other options refer to slow, legacy hard disk based storage and will be removed soon!
- Set “Delete Volume on Instance Delete” to No, so the volume won't be deleted by deleting the instance. Then, you would be able to create a new instance (as a copy of current one) using the existing volume.
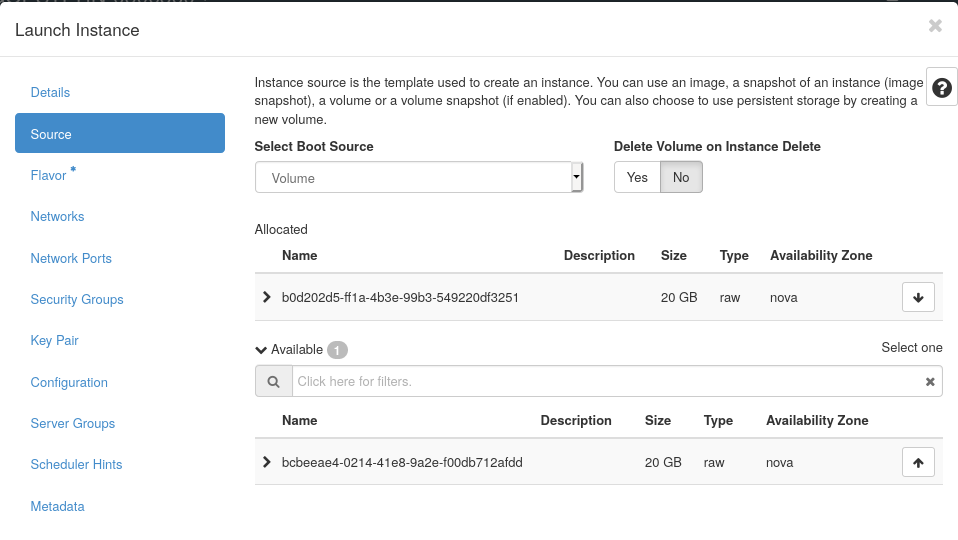
- From an existing volume:
- From “Select Boot Source”, select volume (or volume snapshot if you have one).
- Set “Delete Volume on Instance Delete” to No.
- Select your desired volume from the displayed list.
- Image without root volume (not recommended):
- From “Select Boot Source”, select image (or instance snapshot if you have one).
- Set “Create New Volume” to No.
- Select your desired image from the ones without ssd in their name.
4- After configuring the source, click “next”.
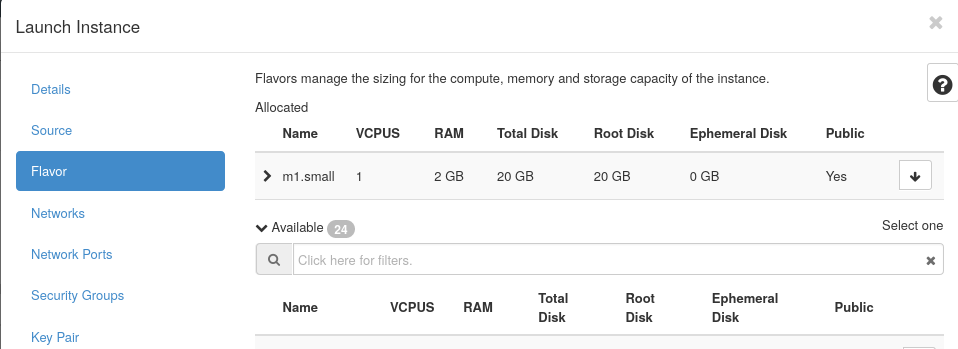
5- Specify your desired flavor which is limited to your quota.
6- Skip “Network” and “Network ports” by clicking “next”.
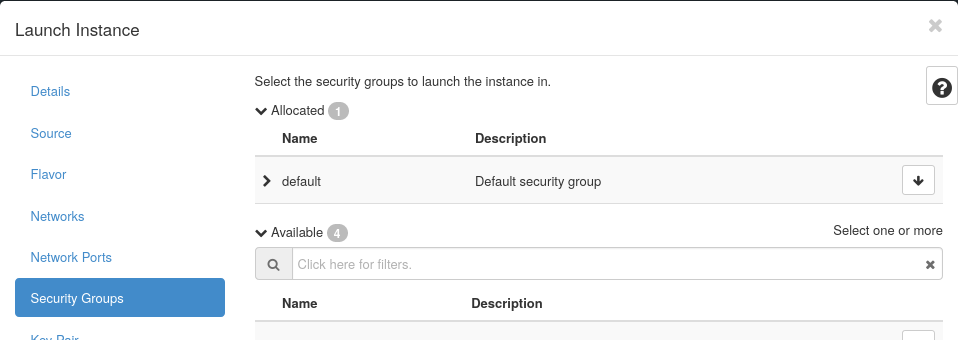
7- If you have any specific security groups rather than default, in “Security Groups” section, select your desired one and remove “default” and click “next”.
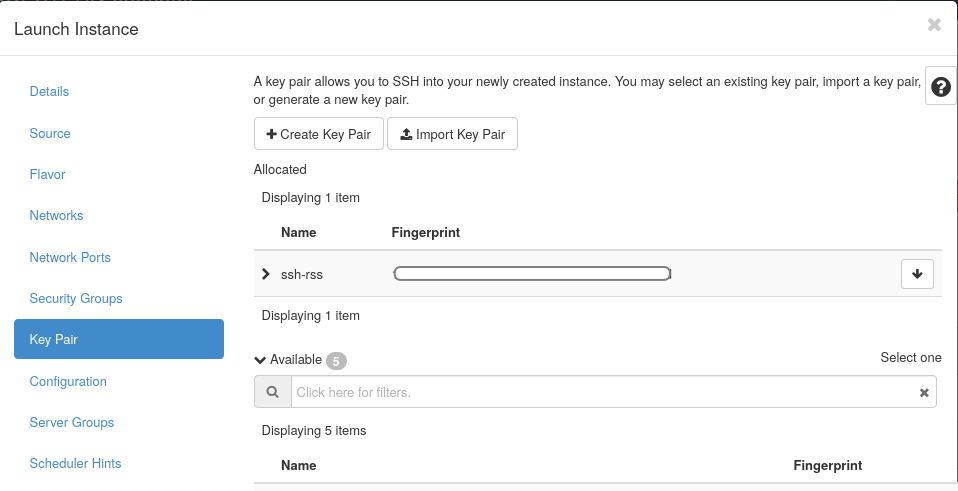
8- If you want to connect your instance via ssh, in “Key Pair” section, select (or import) your public ssh keys and then click “Launch Instance”.
9- Wait until the status of instance is “Active” and the power state shows “Running”.

—–

Manage Instances
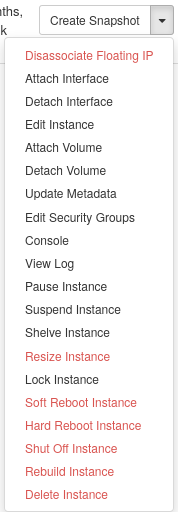
There are several actions which can be applied on a running instance. You can see the list of them by clicking the small arrow on the very right of each instance row.
You can stop instance from working by either Pause Instance , Suspend Instance or Shut Off Instance.
The instance can be restarted by either Soft Reboot Instance or Hard Reboot Instance.
You can increase the memory or CPU of an instance using Resize Instance option. Notice that it is not possible to decrease the resources of an instance. After clicking, in pop-up page, select the new size (should be larger than current size) and click on “Resize”. Wait a little until the Status shows “Confirm or Revert Resize/Migrate”, then click on the button on the right titled now as “Confirm resize/migrate” and wait until the Status is “Running” again.