Table of Contents
Create and Manage Volumes
This manual provide a quick help on how to create, delete, attach and detach your volume using Volumes Dashboard.
To login:
Authenticate using: Keystone Credentials
Domain: gwdg
User Name: your academic email (e.g. myname@gwdg.de)
Password: your Password
Create a new volume
In GWDG horizon dashboard, you can create a volume (block storage) by following these steps:
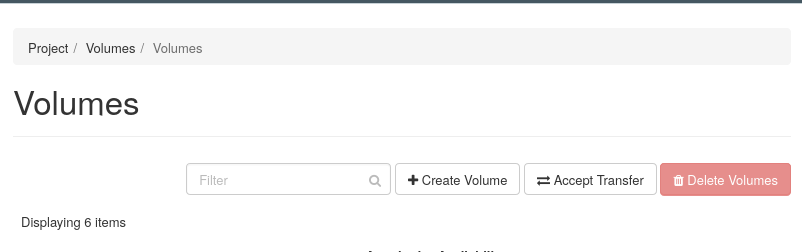
1- From the left menu bar, select project→Volumes→Volumes and then click “Create Volume”.
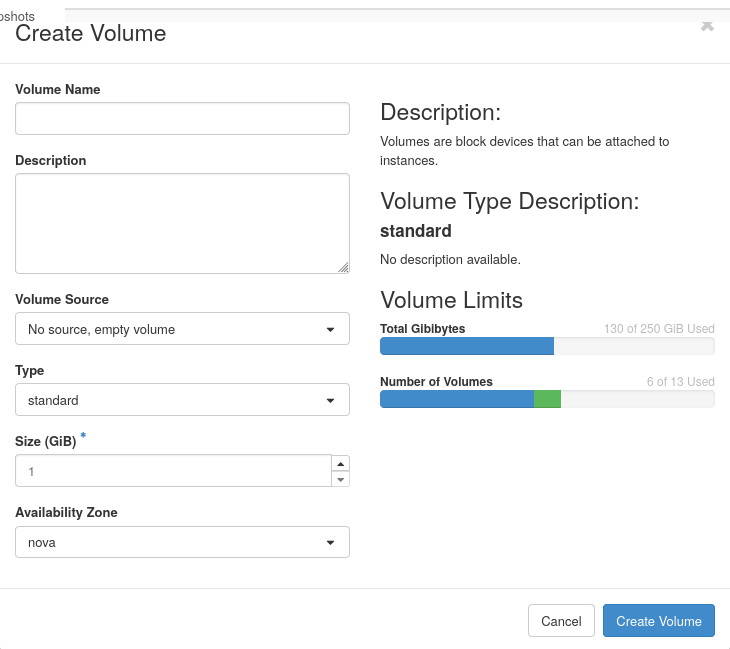
2- Fill the displayed form with the following information:
Please do not use any character rather than standard alphanumeric!
- Volume Name: Specify a name for the volume.
- Description: Optionally, provide a brief description for the volume.
- Volume Source: Select “No source, empty volume” unless you want to create the volume as a copy of an existing volume or image.
- Type: Select “ssd” for a faster SSD-based storage or “standard” (not recommended) for a legacy HDD-based storage.
- Size (GiB): The size of the volume in gibibytes.
- Availability Zone: Leave it with default value “nova”.
3- Click “Create Volume” and wait until the status of the volume is “Available”.
Manage an existing volume
There are several actions which can be applied on a volume. You can see the list of them by clicking the small arrow on the very right of each volume row. The most useful ones are described as follow.
The volume which is not attached and has no related snapshot can be deleted by Delete Volume .
The size of the volume which is not attached can be increased by Extend Volume .
The volume which is not attached can be transferred to another project by Create Transfer . The necessary quota in destination project should be met. The provided “Transfer ID” and “Authorization Key” should be given to receiver, to be used for accepting the transfer.
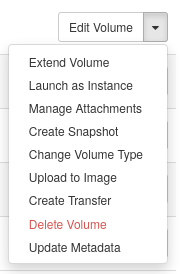
To attach or detach a Volume to or from an instance, the Manage Attachments option should be used.
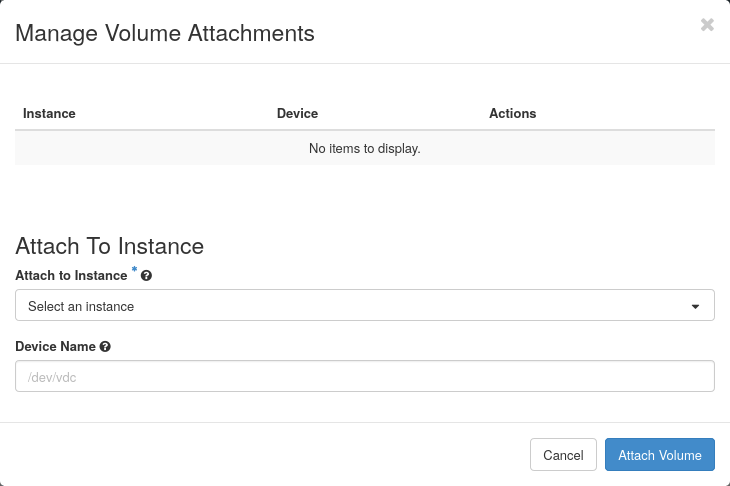
To attach a volume to a running instance, the following steps should be fulfilled:
- Select “Manage Attachment” of a volume with “Available” status.
- On displayed form, select the intended instance from the “Attach to Instance” list.
- You can optionally change the device name.
- Click “Attach Volume”.
- Connect to your instance and run “sudo fdisk -l” or “sudo lsblk” to verify if the volume is attached.
- To format your device, execute: “sudo mkfs.ext4 /dev/vdc” (/dev/vdc should be replaced by your device name if it is different)
- Create a directory for mounting the new storage volume: “sudo mkdir /mnt/my-volume”.
- Mount the new volume: “sudo mount /dev/vdc /mnt/my-volume”
- Add the mounting command to “fstab”, so you won't need to mount it after each reboot:
- Run “vim /etc/fstab” to edit the file.
- Press “i” to be in insert mode. And then go to the end of existing text and press Enter to be in a new line.
- Add the line (change the names based on your state): “/dev/vdc /mnt/my-volume ext4 defaults 0 0”
- Press “Esc” to exit from insert mode. Then press “:wq” to save the changes and exit.
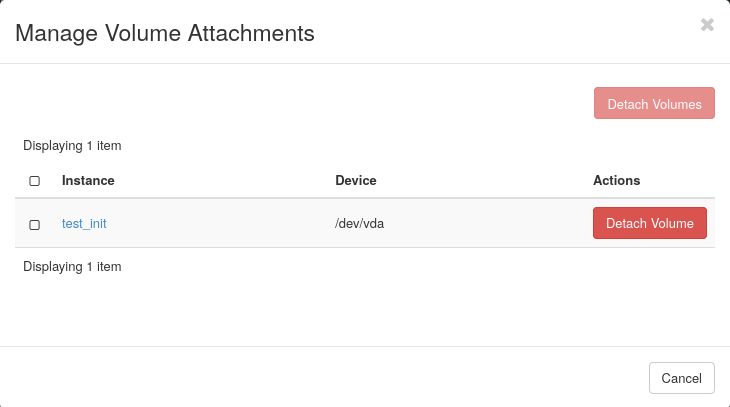
To detach a volume from an instance, the following steps should be fulfilled:
- Be sure that you have unmounted the Volume inside your instance.
- Select “Manage Attachment” of a volume with “In-use” status.
- Click “Detach Volume” of intended instance.
- Confirm displayed message.
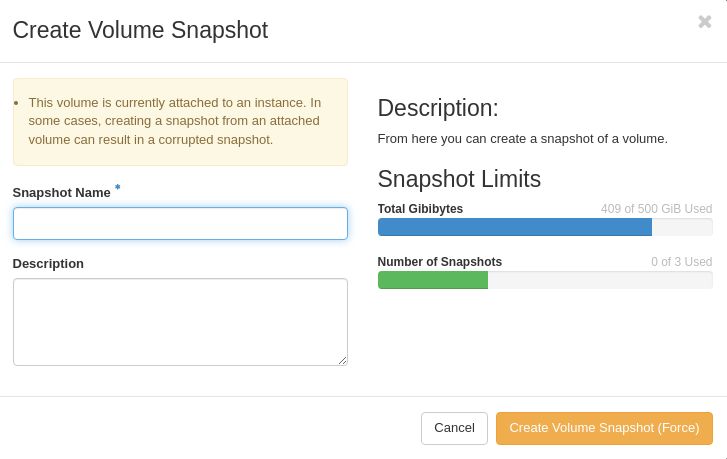
Create a Snapshot
To create a snapshot, click the small arrow on the very right of each volume row and select Create Snapshot.
Define a name and optionally a description and click Create Volume Snapshot. Please check your volume and your snapshot quota to be sure that it is enough, otherwise you will get an error.
The Snapshot will be accessible from the left menu bar, project→Volumes→Snapshots. You can create a new server from the listed snapshots.