Table of Contents
eduroam with Windows (Vista+)
Eduroam can be installed using either configuration wizard (CAT tool) or manual. To install with the CAT tool, you must have an Internet connection (LAN, WLAN, cellular) to download the wizard.
It is strongly recommended to install eduroam using the configuration wizard (CAT tool), which is available for participating institutes at https://cat.eduroam.org .
Setting up the eduroam with the CAT tool
After downloading the eduroam configuration assistant from here just run the .exe file. This will launch the assistant.

Follow the assistant until you are asked for your credentials. Enter your credentials according to the table in the username section.

After finishing the assistant your computer will automatically connect to the eduroam network if it is available.
Manual eduroam configuration
To set up eduroam manually, you may need to install the T-TeleSec root certificate. You can download the root certificate from the following link and install it on your device: https://www.pki.dfn.de/fileadmin/PKI/zertifikate/T-TeleSec_GlobalRoot_Class_2.crt]
The following steps are required for manual eduroam configuration:
1. Click right on the network symbol in your status bar and choose Open Network & Internet settings.

2. Click Network and Sharing Center.

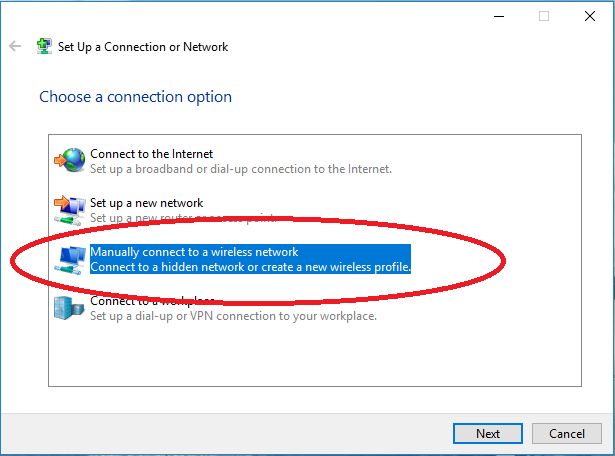
3. Now you choose Set up a new connection or network.

4. Choose Manually connect to a wireless network and click next.
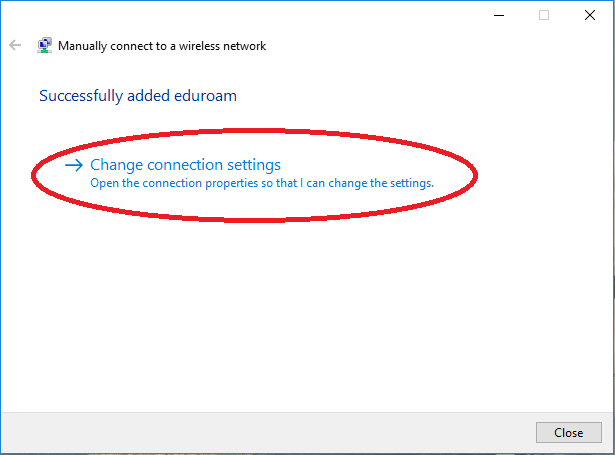
5. In network name put eduroam, as security type WPA2-Enterprise, encryption type AES, click on next.

6. Click on Change connection settings.
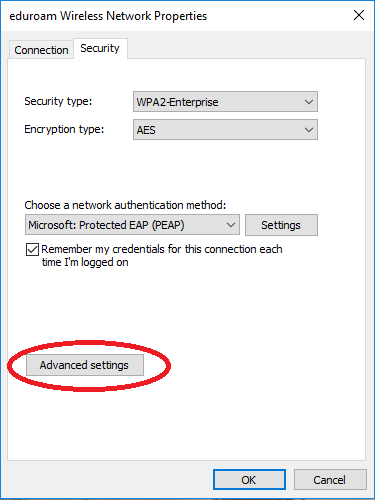
7. Now you just change the Network properties. Select Microsoft: Protected EAP (PEAP) as the method, click on settings.

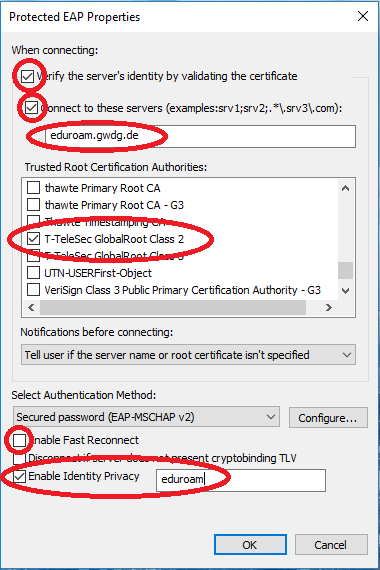
8. Check the boxes for Verify the server's identity by validating the certificate and on Connect to these servers and uncheck Enable Fast Reconnect. Activate the option Enable Identity privacy and enter eduroam in the following text field.
Choose the certificate T-TeleSec Global Root Class2 at the list of Trusted Root Certification Authorities.
Select Secured password (EAP-MSCHAP v2) as Authentication Method and click on Configure.
9. Uncheck automatically use Windows… and click OK.

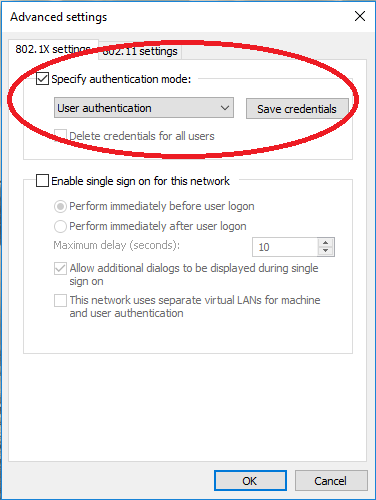
10. Click on Advanced settings. Check Specify authentication mode and choose User authentication.
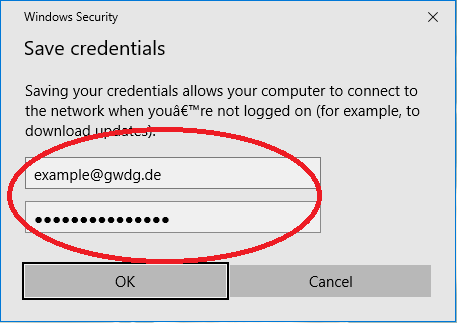
11. At last click on “Save credentials” and type in your username and password.
Now you can connect to eduroam. If this does not happen automatically after set-up just click the SSID in the list of available wireless networks to connect.
What should I do if the eduroam setup is not successful with the CAT tool?
Please first delete the existing eduroam profile on your system. Then use the CAT tool to set up eduroam again.
Instructions for deleting the eduroam profile under Windows
1. Please open the “Command Prompt” window.
For example, you can open the “Command Prompt” window by typing the command cmd into the search field Enter text here to search in the menu bar at the bottom of the screen and then pressing the Enter key.
2. In the “Command Prompt” window, enter the following command. (If the eduroam profile has not been successfully deleted, please use name=Eduroam!)
netsh wlan delete profile name=eduroam
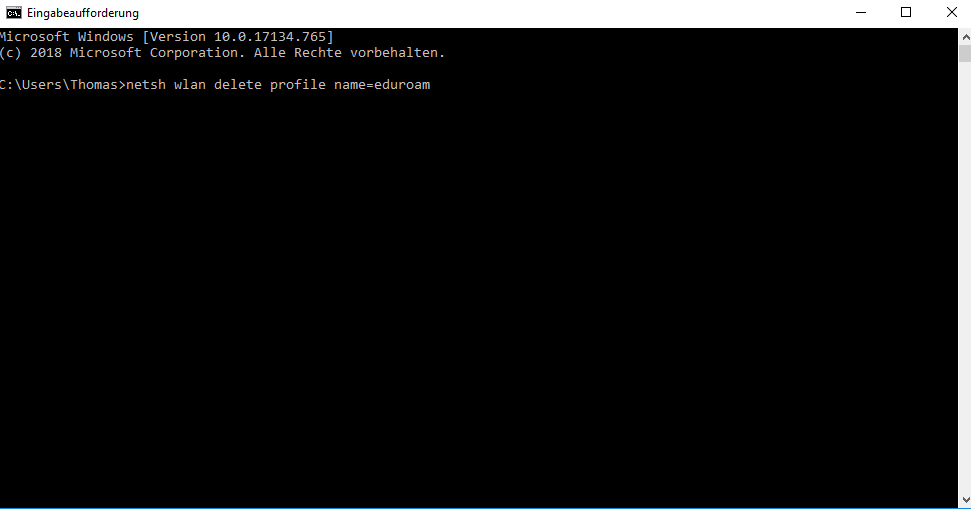
Result: The eduroam profile is now deleted from your system.